
After creating a new room layout, the configuration page opens. It consists of two tabs: Room layout config to configure the seating and camera layouts, and Camera preset config to configure the camera tracking:
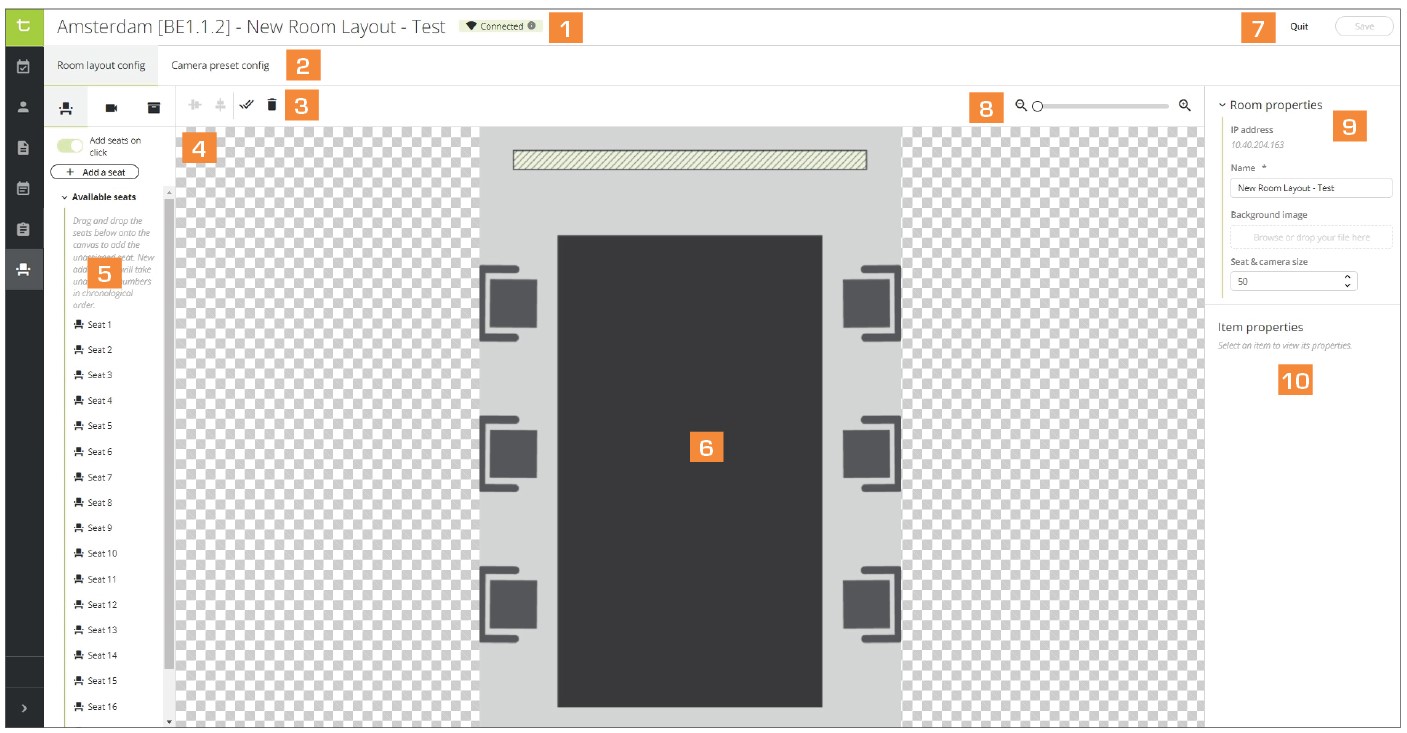
- Connection status of the room.
- Room Layout Configuration tab / Camera Preset Configuration tab
- Configure the seating layout
 / Configure the camera layout
  / Configure a wideshot camera
  / Align vertically
  / Align horizontally
  / Select all seats or cameras
  / Delete a seat or a camera
- Activate the Add seats on click option, then click on the background image to position the seat.
- Drag & drop the seat to the correct location on the image.
- Background image.
- Quit without saving, or click on
 to save the current room layout configuration.
 - Zoom in/out the background image.
- Room properties: change the name of the room layout, the background image and the size of the seats on the image.
- Item properties: adjust the position of the seat on the background image.
Check the Connection Status of the Room
It is possible to configure or edit a room layout when you are connected to the Confero Platform but disconnected from the room. Hover on the connection status on top of the page to know the current connection status:
| The connection to the gateway and central unit is successful. The last timestamp is indicated. | |
| There is no connection to the gateway. The last successful timestamp is indicated. | |
| The connection to the gateway and central unit is successful. A meeting is currently in progress. |
Add Seats
⚠️ Keep in mind that if you are not connected to the room, the list of available seats you’ll be using may be outdated, and new added seats may be unavailable.
⚠️ To avoid detection issues, make sure to power on the cameras first and leave them on for a few seconds before powering on the Gateway.
1. In the Room layout config tab, click on the the Seat icon ![]() (1) to display the Seats panel on the left:
(1) to display the Seats panel on the left:
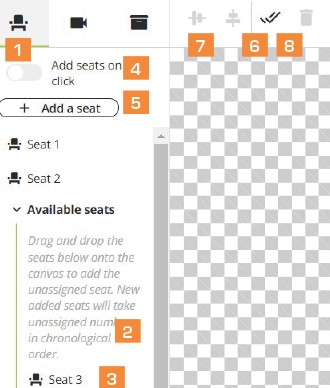
2. In the Seats panel, click on Available seats (2) to see the dropdown list of seats.
3. Assign seats to the layout. They are three ways to do it:
- Drag & drop the seat ID (3) to the correct location on the background image.
- Activate the Add seats on click option (4), then click on the background image to position the seat.
- Click on Add a seat (5) on top of the panel. A seat with an ID appears in the middle of the background image. Position the seat on the image with your mouse. You can also use this icon to add extra seats when there are no more available seats in the dropdown list.
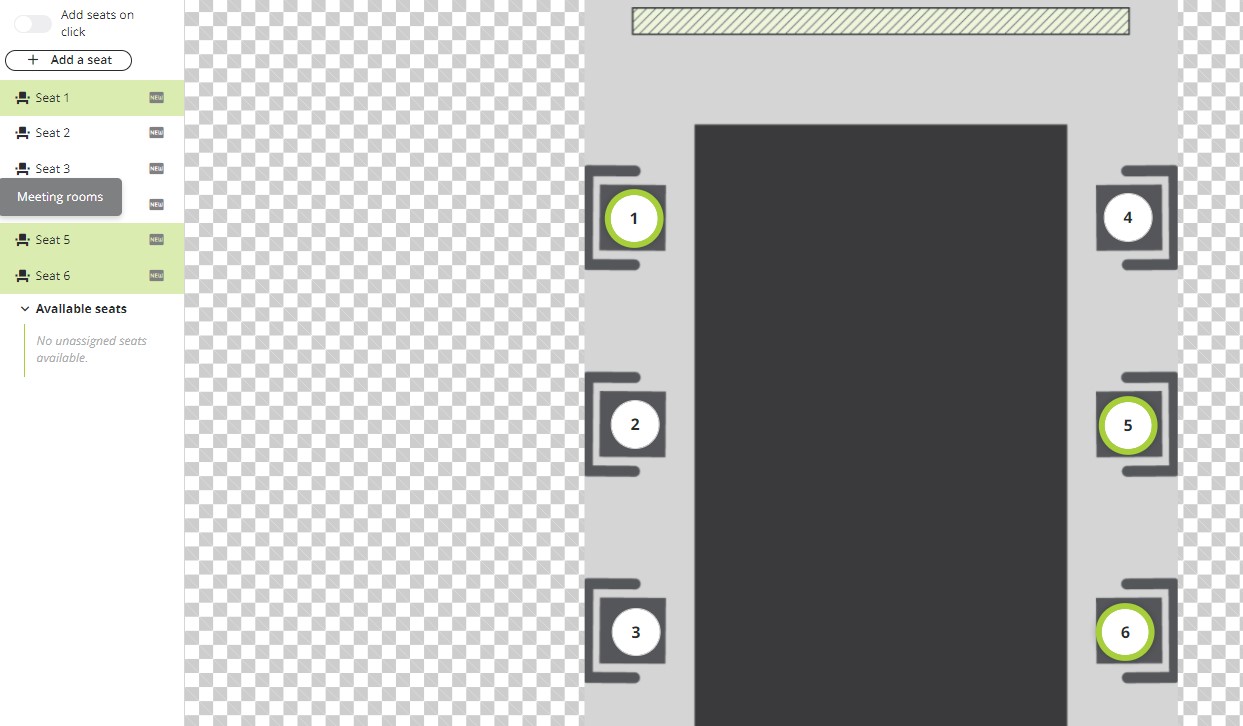
4. The assigned seat is removed from the list of available seats and appears above.
5. If necessary, adjust the size of the background image by zooming in or out, and the size of the seats on the image via the Room properties panel on the right side of the page.
6. If necessary, change the position of the seats with your mouse, with your keyboard (press the arrows for moving them slowly, or press SHIFT + arrows to move them quickly), or via the Item properties panel on the right side of the page. When selecting seats, you can also press the SHIFT key of your keyboard as well as the arrows to move them on the background image.
- To select all assigned seats at the same time, click on the Select all icon (7). The selected seats are highlighted in green.
- To select specific seats, click one and hold the SHIFT or CTRL key, then click on the other seats. The selected seats are highlighted in green.
7. To align vertically and/or horizontally, use the following icons: ![]() and
and ![]() (8). You can also press the SHIFT key of your keyboard as well as the arrows to move the seats.
(8). You can also press the SHIFT key of your keyboard as well as the arrows to move the seats.
8. To remove a seat, click on it on the background image or in the list in the left panel, then click on ![]() (9). You can also press the Delete key of your keyboard.
(9). You can also press the Delete key of your keyboard.
9. Click on ![]() to save the current room layout configuration.
to save the current room layout configuration.
Add Cameras
In this tab, you can assign up to 8 cameras to the room layout. These cameras will focus on the seats/speakers.
⚠️Note that the cameras will have to be configured with the correct settings.
1. In the Room layout config tab, click on the the Camera icon ![]() (1) to display the Cameras panel on the left:
(1) to display the Cameras panel on the left:
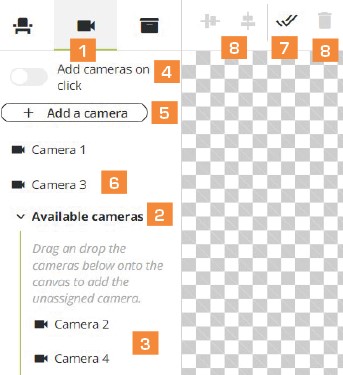
2. In the Cameras panel, click on Available cameras (2) to see the dropdown list of cameras.
3. Assign a camera to the layout. They are three ways to do it:
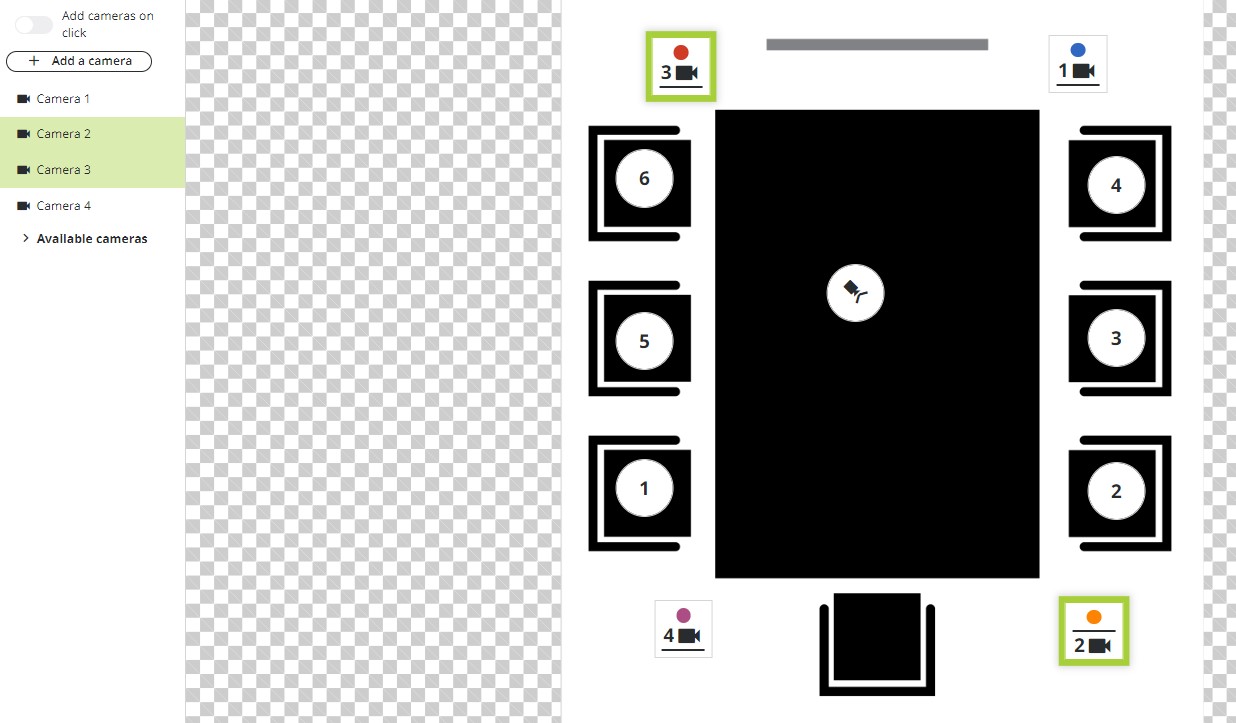
- Drag & drop the camera (3) to the correct location on the background image.
- Activate the Add cameras on click option (4), then click on the background image to position the camera.
- Click on Add a camera (5) on top of the panel. A popup opens where you have to enter the IP address of the camera, select its orientation and select its brand. There is also a link to the Confero Knowledge Base where you will find configuration information about the model of your camera.
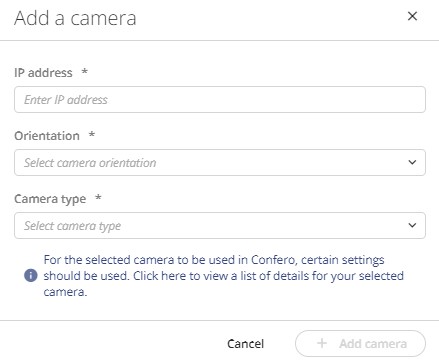
- When these information have been validated, position the camera on the correct location with your mouse. You can also use this icon to add extra cameras when there are no more available cameras in the dropdown list.
4. The assigned camera is removed from the list of available cameras and appears on top in the Cameras panel (6).
5. If necessary, change the position of the cameras with your mouse, with your keyboard (press the arrows for moving them slowly, or press SHIFT + arrows to move them quickly), or via the Item properties panel on the right side of the page, or edit the cameras’ information in the Camera details panel.
- To select all assigned cameras at the same time, click on the Select all icon (7). The selected cameras are highlighted in green.
- To select specific cameras, click one and hold the SHIFT or CTRL key, then click on the other cameras. The selected cameras are highlighted in green.
6. To align vertically and/or horizontally, use the following icons: ![]() and
and ![]() (8). You can also press the SHIFT key of your keyboard as well as the arrows to move the seats.
(8). You can also press the SHIFT key of your keyboard as well as the arrows to move the seats.
7. To remove a camera, click on it on the background image or in the list in the left panel, then click on ![]() (9). You can also press the Delete key of your keyboard.
(9). You can also press the Delete key of your keyboard.
8. Click on ![]() to save the current room layout configuration.
to save the current room layout configuration.
👉 The assigned camera models need specific configuration. Click here to access the camera configuration page and pick your model.
Add a Wideshot Camera
A wideshot camera will show the whole room or table.
1. In the Room layout config tab, click on the the Wideshot camera icon ![]() (1) to display the Camera panel on the left:
(1) to display the Camera panel on the left:
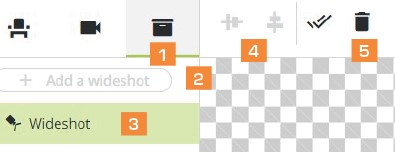
2. Assign the wideshot camera to the layout: in the left panel of the page, click on Add a wideshot (2). A popup opens where you have to enter the IP address of the camera, select its orientation and select its brand. When these information have been validated, position the camera on the correct location with your mouse.
3. The wideshot camera shows in green in the camera panel (3).
4. If necessary, change the position of the wideshot camera via the Item properties panel on the right side of the page or with your keyboard arrow keys (press the arrows for moving them slowly, or press SHIFT + arrows to move them quickly).
5. To align vertically and/or horizontally, use the following icons: ![]() and
and ![]() (4). You can also press the SHIFT key of your keyboard as well as the arrows to move the seats.
(4). You can also press the SHIFT key of your keyboard as well as the arrows to move the seats.
6. To remove the camera, click on it on the background image or in the left panel, then click on ![]() (5). You can also press the Delete key of your keyboard.
(5). You can also press the Delete key of your keyboard.
7. Click on ![]() to save the current room layout configuration.
to save the current room layout configuration.
👉 The assigned camera model needs specific configuration. Click here to access the camera configuration page and pick your model.
⚠️ The IP address of the cameras can be achieved through DHCP. In that case, the IP should be fixed in the DHCP server. If the engine is in DHCP mode, make sure that the IP address is in always in the same range.
>> Click here to configure the model of your cameras.
>> Click here to configure the camera director