When assigning cameras to a room layout, it is necessary to also configure the model of the cameras. Each model has a specific interface and settings, and this page will guide you through the configuration process. Pick your model in the list and follow the configuration steps.
⚠️ To avoid detection issues, make sure to power on the cameras first and leave them on for a few seconds before powering on the Gateway.
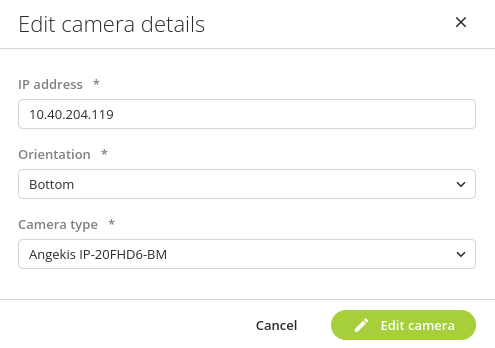
1. Add the camera in the Room Layout:
- Enter the IP address of the camera.
- Select the orientation of the camera (all orientations are supported).
- Select the following camera brand: Angekis IP-20FHD6-BM.
2. Go to the website of the camera:
- Enter the following URL in the address bar: http://10.40.204.119/
- Enter the default login credentials:
- Username: admin
- Password: admin
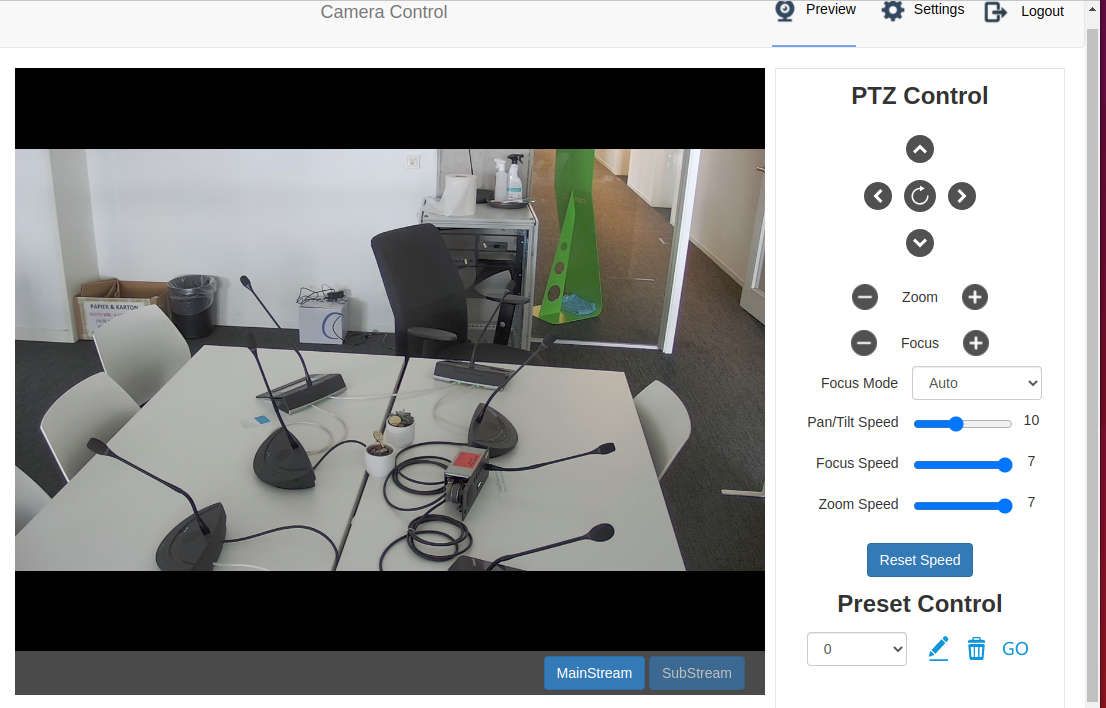
- The page here-above appears, and you should get a video preview.
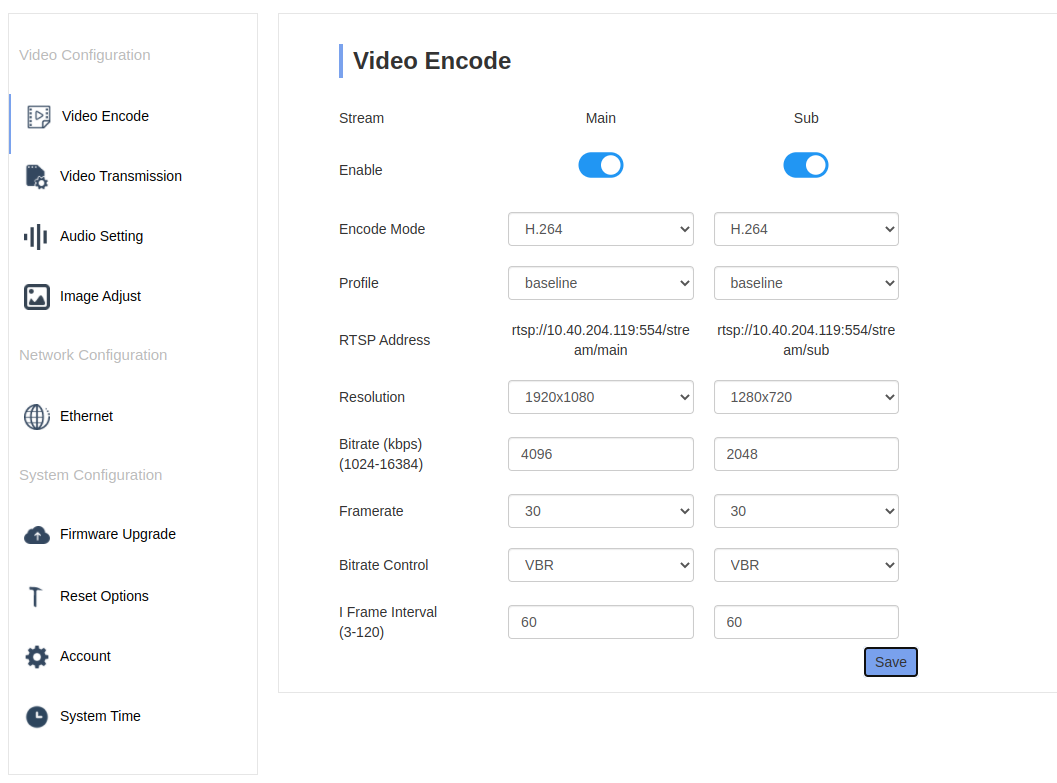
3. Configure the video settings:
- Click on Settings in the top right menu of the page.
- Click on Video Encode in the left menu.
- Make sure that all the settings are the same as in the screenshot here-above.
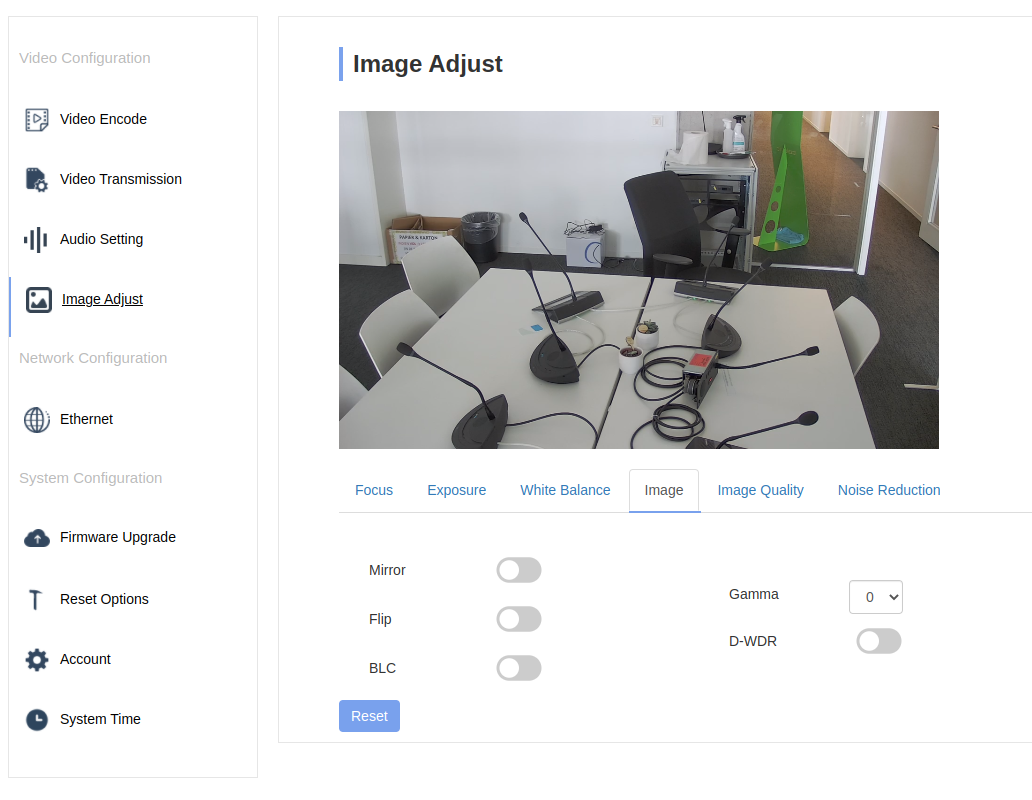
4. Configure the camera settings:
- Click on Image Adjust in the left menu.
- Click on the Image tab in the menu under the preview.
- Select the image orientation:
– For upside-down orientation, select both Mirror and Flip.
– For normal/bottom orientation, unselect both Mirror and Flip.
5. Disable audio:
- Click on Audio Settings in the left menu.
- Unselect Audio State.

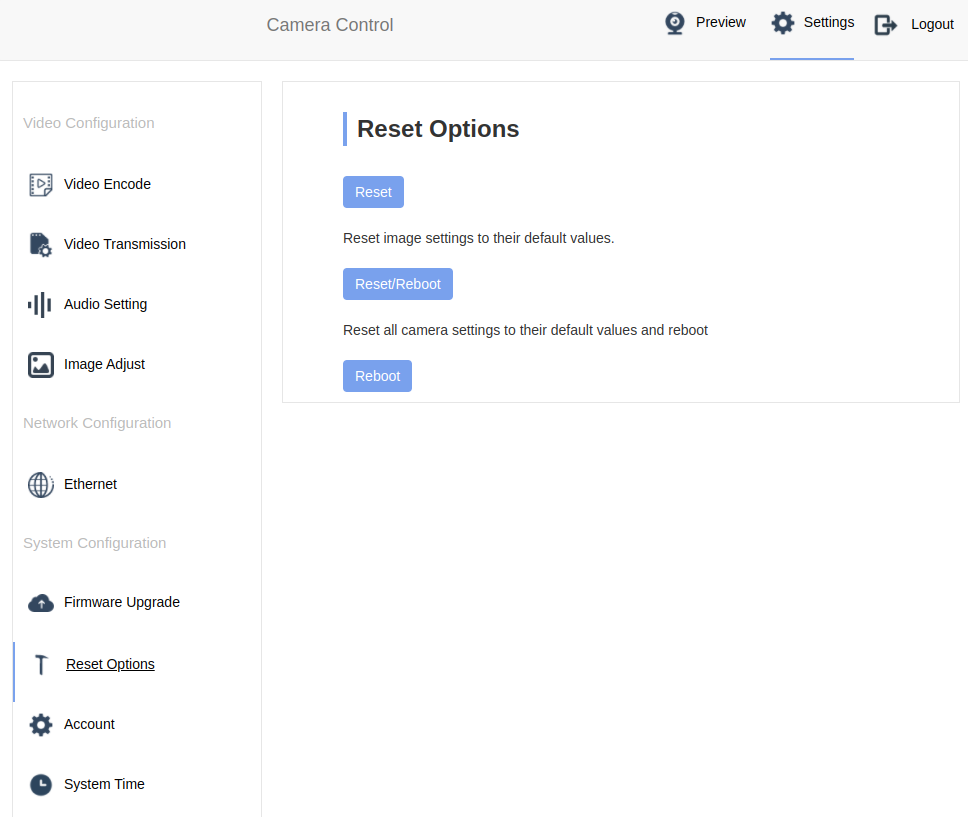
6. Reboot the camera:
- Click on Reset Options in the left menu.
- Click on Reboot.
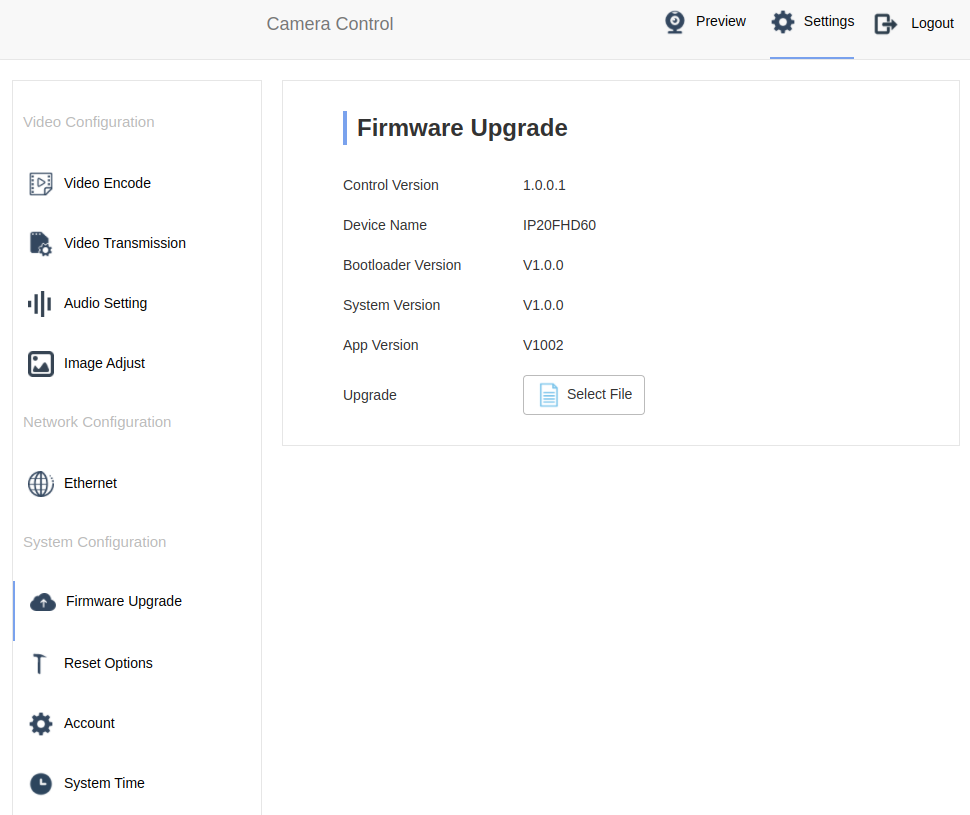
7. Firmware:
- Click on Firmware Upgrade in the left menu.
- The Angekis camera has only been validated with the firmware here-above.
⚠️ To avoid detection issues, make sure to power on the cameras first and leave them on for a few seconds before powering on the Gateway.
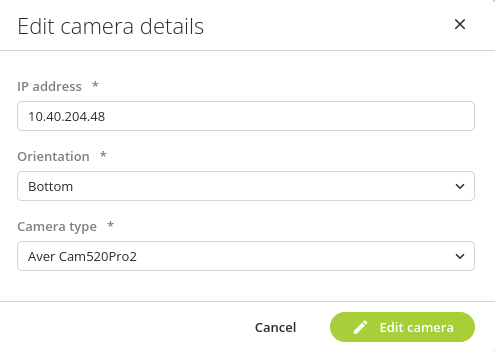
1. Add the camera in the Room Layout:
- Enter the IP address of the camera.
- Select the orientation of the camera (all orientations are supported).
- Select the following camera brand: Aver Cam520Pro2.
2. Go to the website of the camera:
- Enter the following URL in the address bar: http://10.40.204.48/
- Enter the default login credentials:
- Username: admin
- Password: admin
- The page here-below appears, and you should get a video preview.
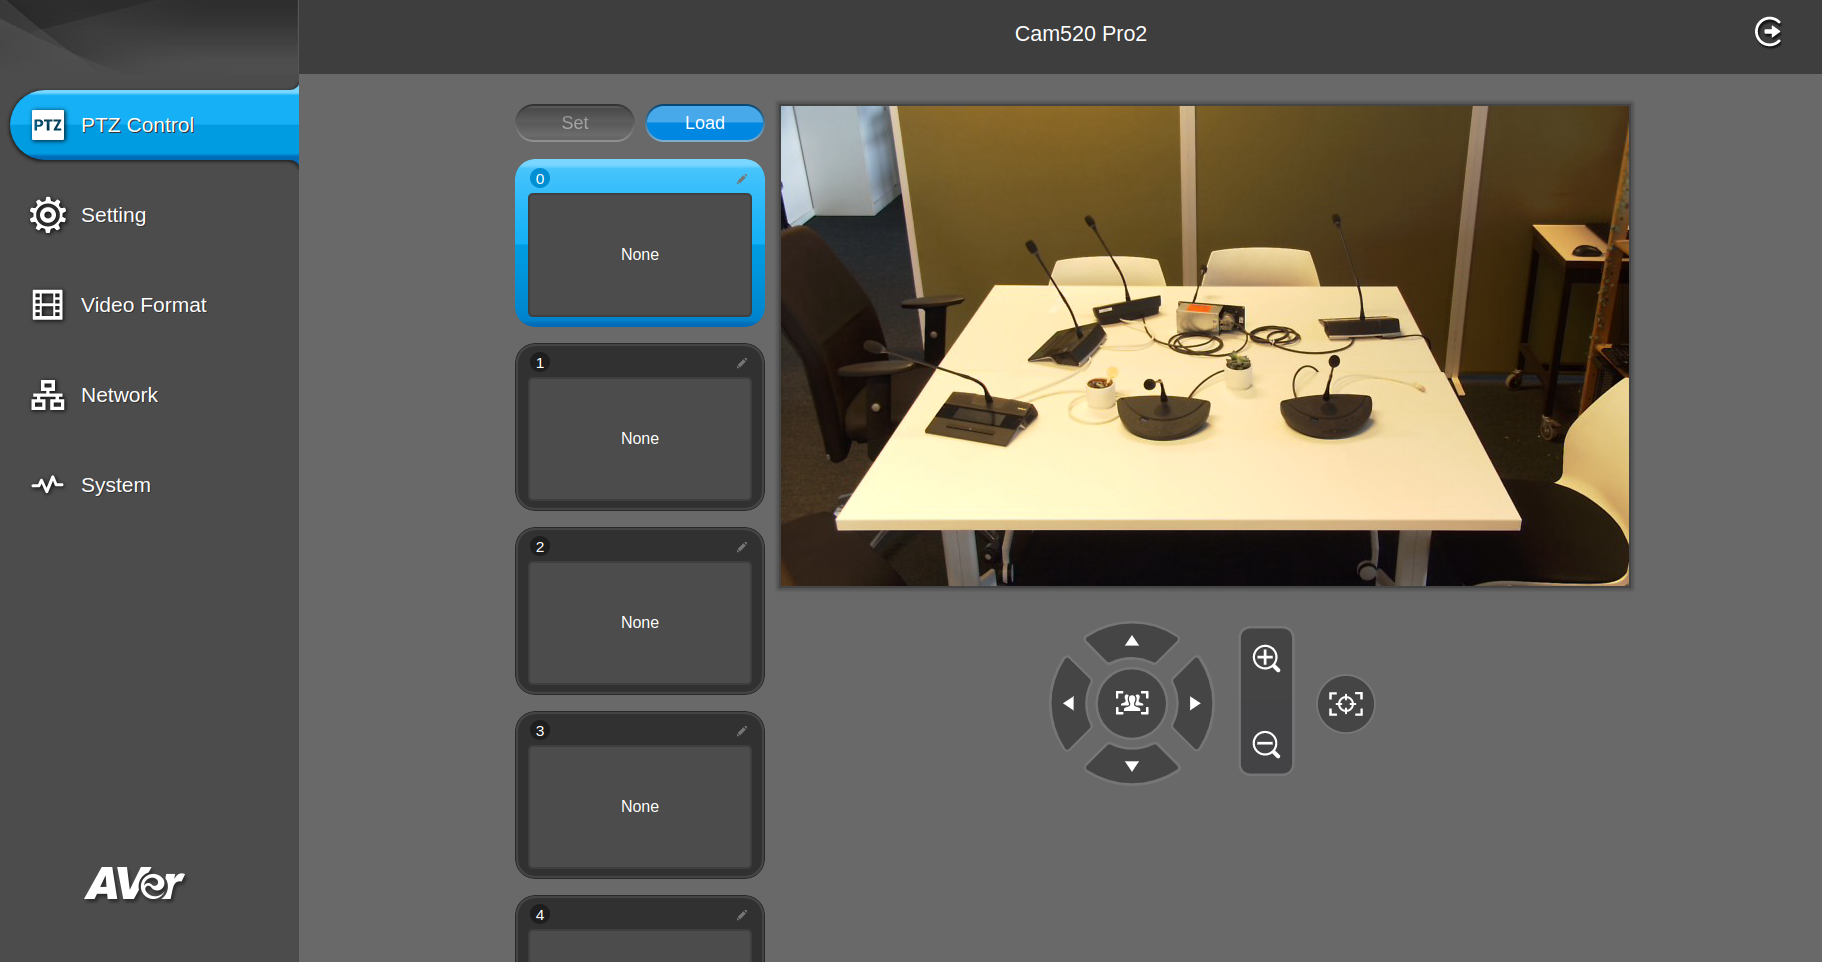
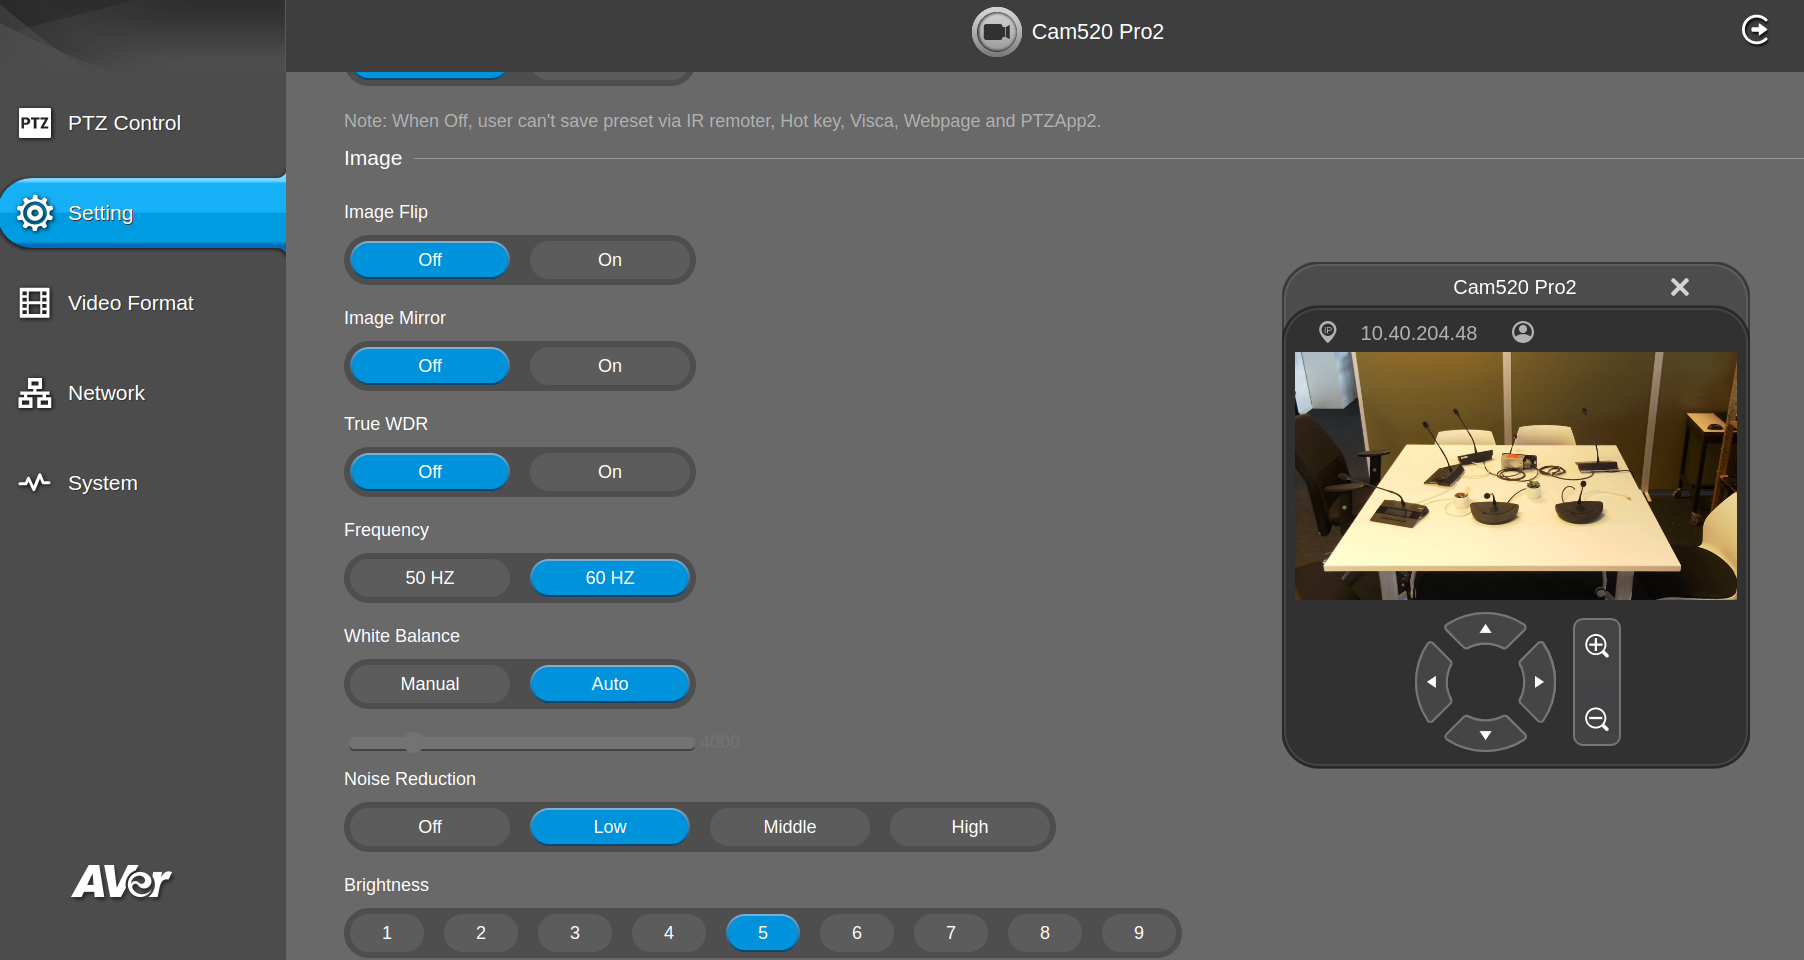
3. Configure the camera settings:
- Click on Settings in the left menu.
- Scroll down to Settings.
- Select the image orientation:
- For upside-down orientation, activate both Image Flip and Image Mirror.
- For normal/bottom orientation, deactivate both Image Flip and Image Mirror.
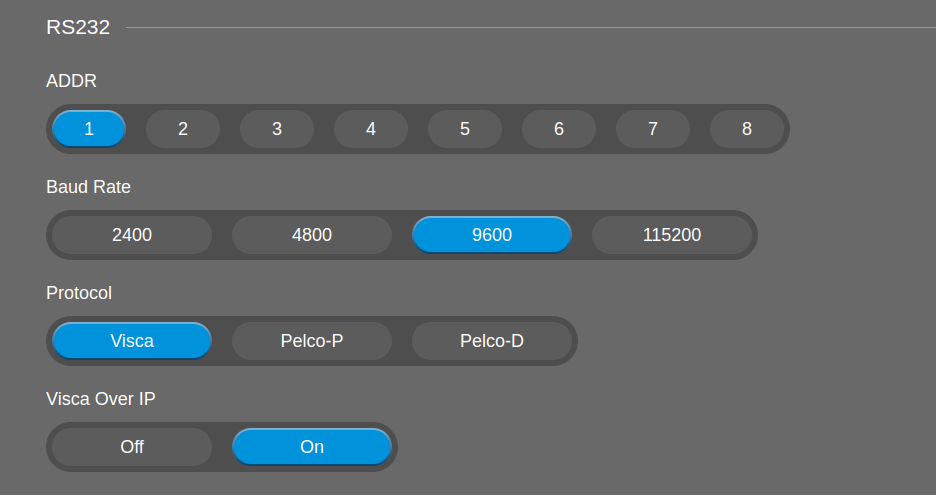
4. Configure the VISCA protocol:
- Scroll down to RS232.
- Set the protocol to Visca.
- Set Visca Over IP to On.
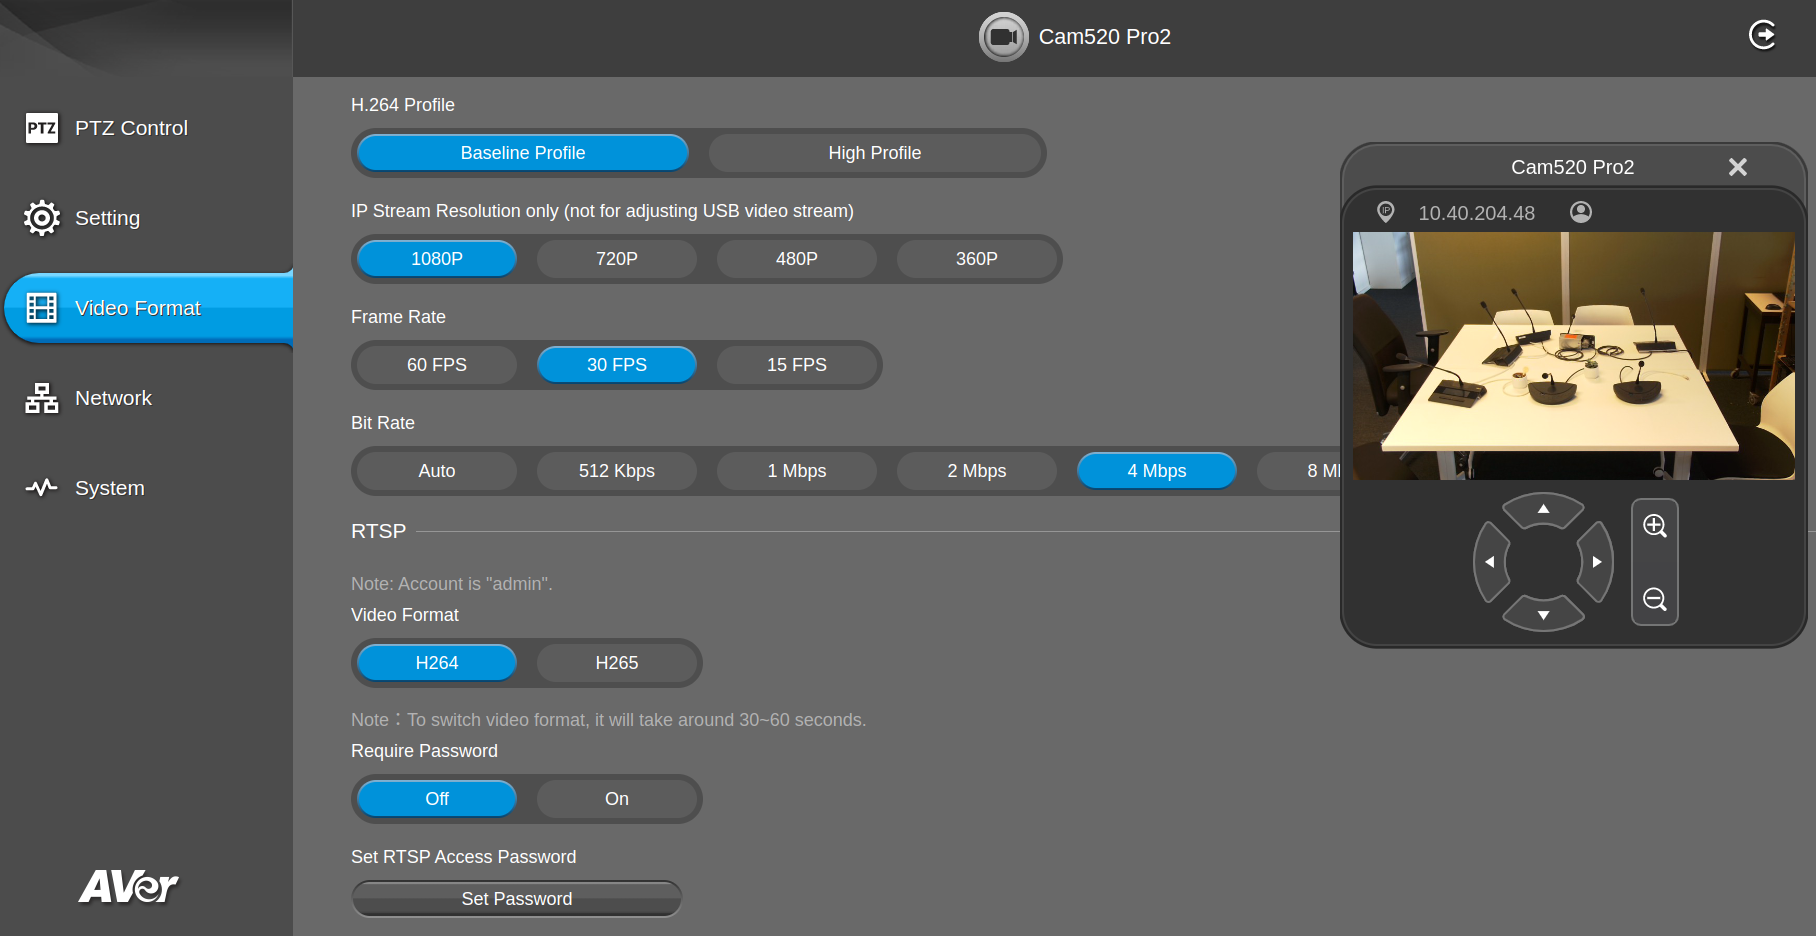
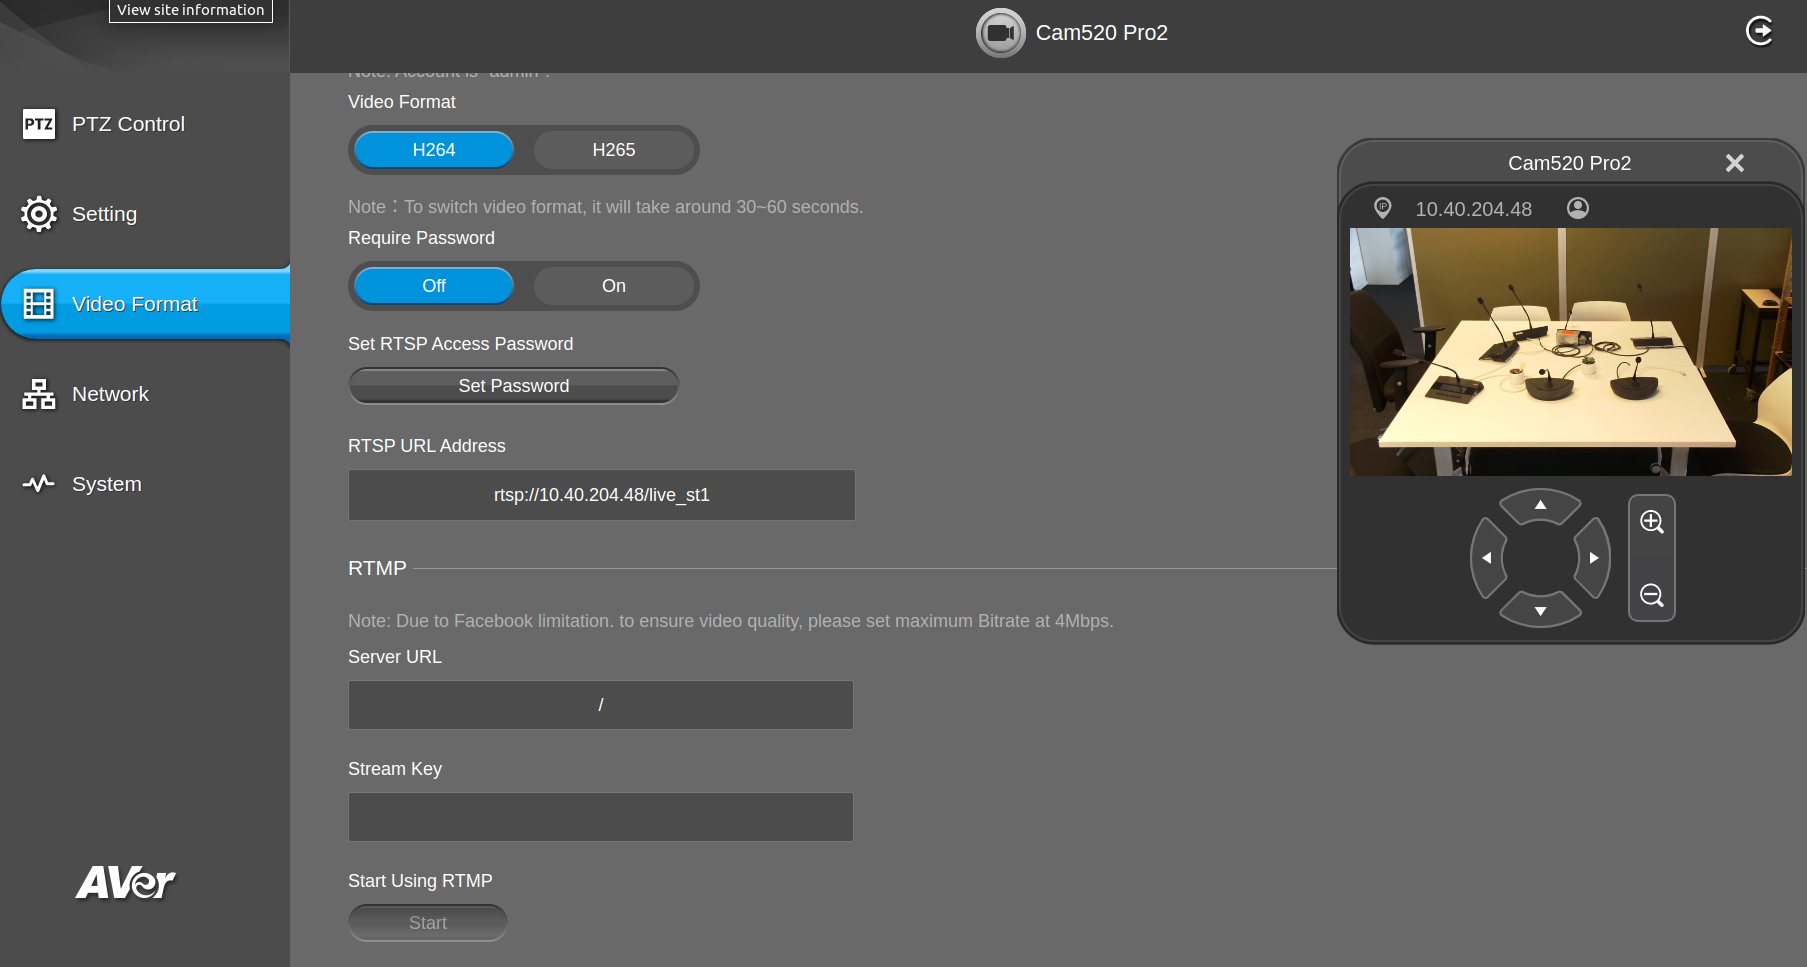
5. Configure the video settings:
- Click on the Video Format tab in the left menu.
- Make sure that all the settings are the same as in the two screenshots here-below.
6. Reboot the camera.
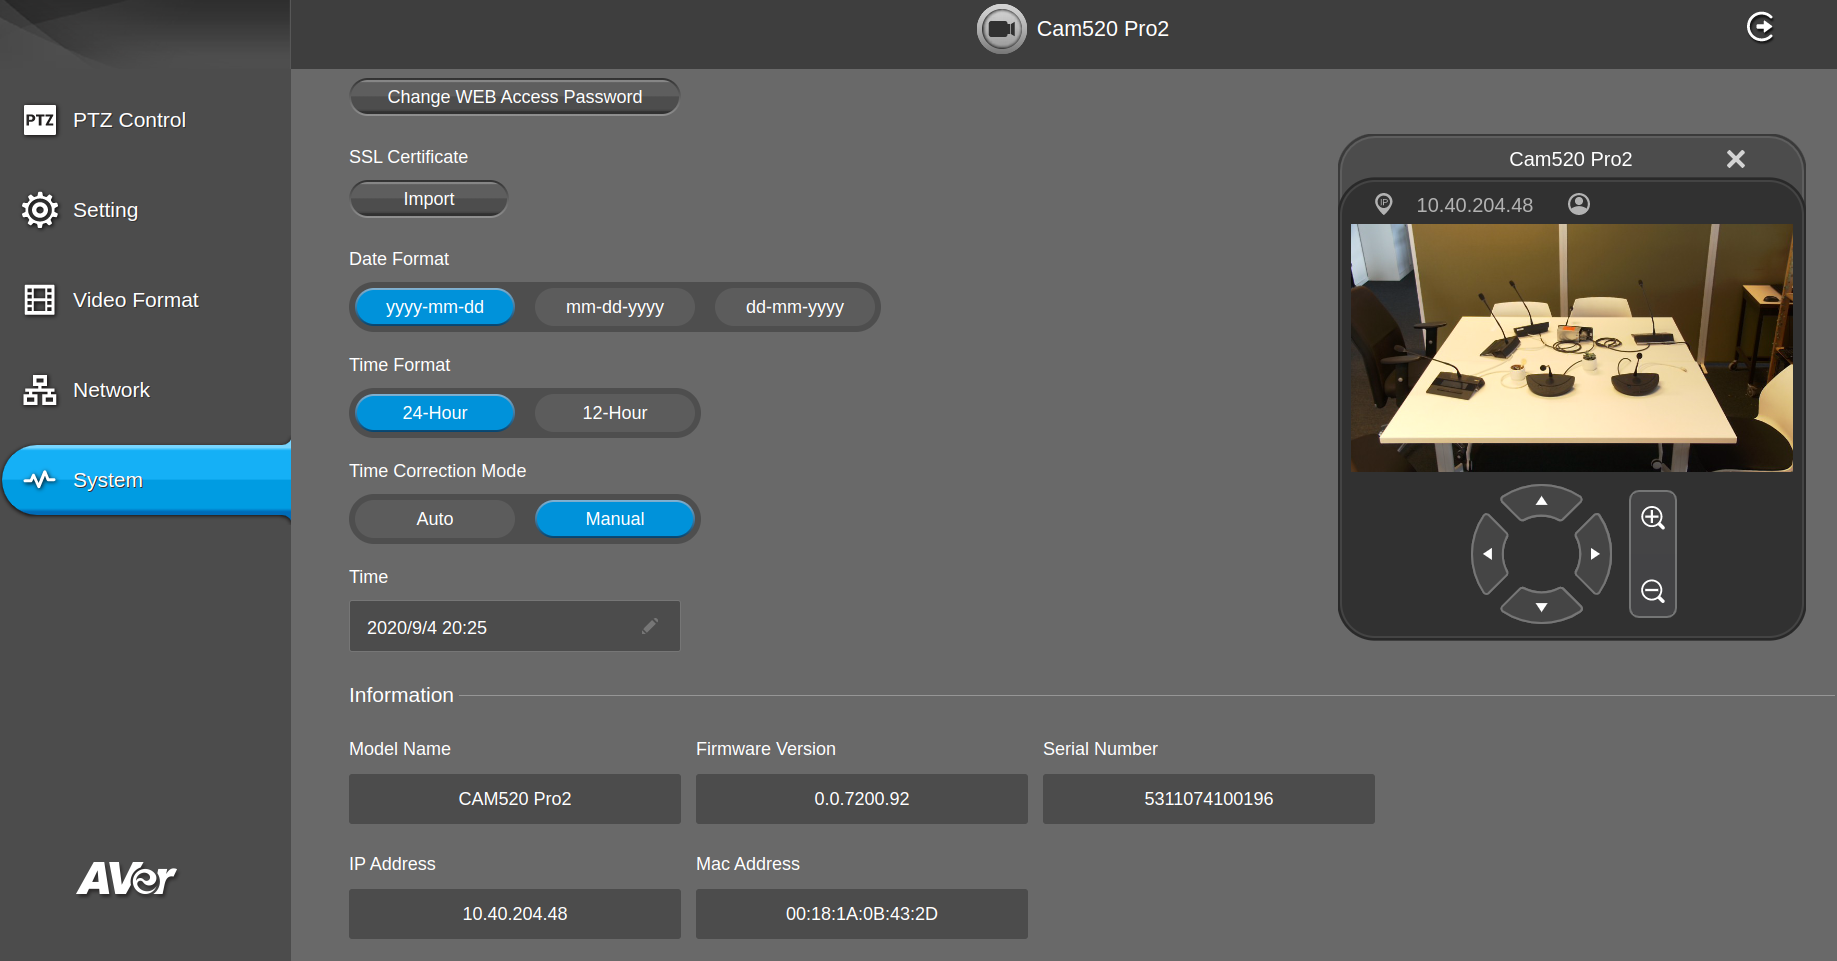
7. Firmware:
- Click on System in the left menu.
- The AVER camera has only been validated with the firmware indicated in the Information section of the screenshot here-below.
⚠️ To avoid detection issues, make sure to power on the cameras first and leave them on for a few seconds before powering on the Gateway.
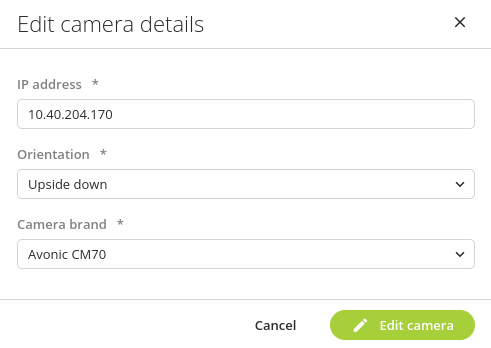
1. Add the camera in the Room Layout:
- Enter the IP address of the camera.
- Select the orientation of the camera (all orientations are supported).
- Select the following camera brand: Avonic CM70.
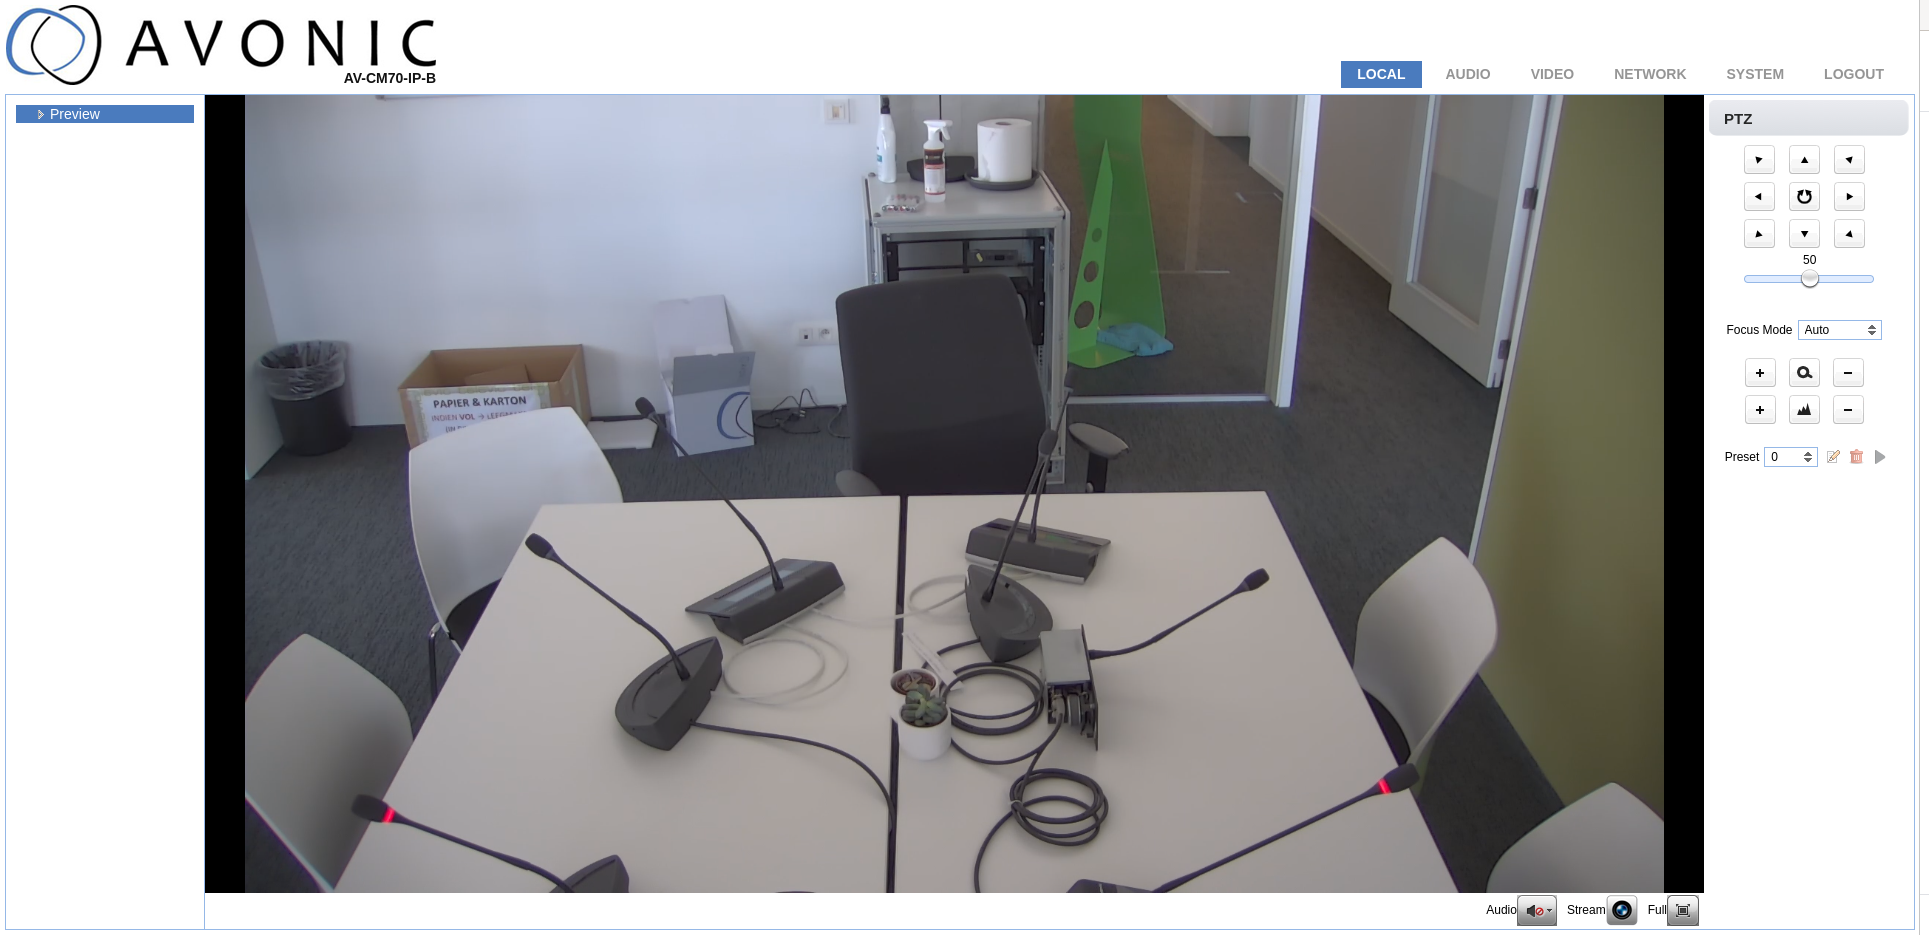
2. Go to the website of the camera:
- Enter the following URL in the address bar: http://10.40.204.170/
- Enter the default login credentials.
- Username: admin
- Password: admin
- The page here-above appears, and you should get a video preview.
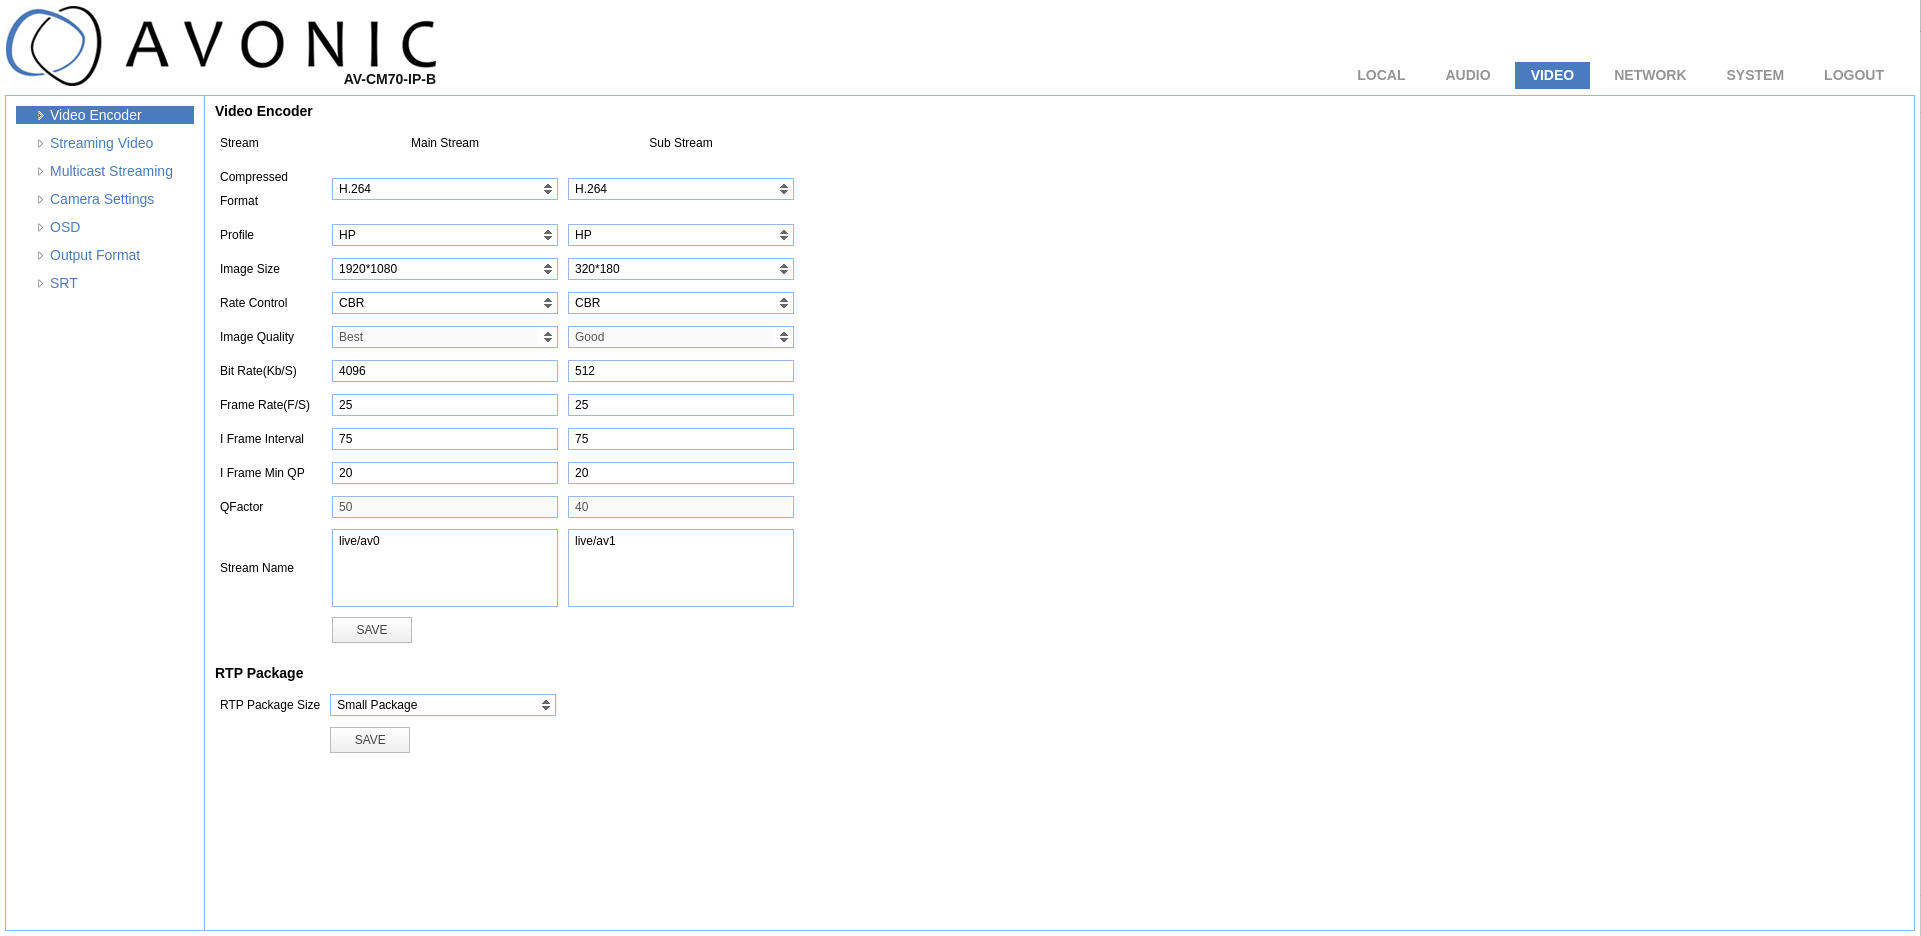
3. Configure the video settings:
- Click on the Video tab in the top right menu of the page.
- Click on Video Encoder in the left menu.
- Make sure that all the settings are the same as in the screenshot here below:
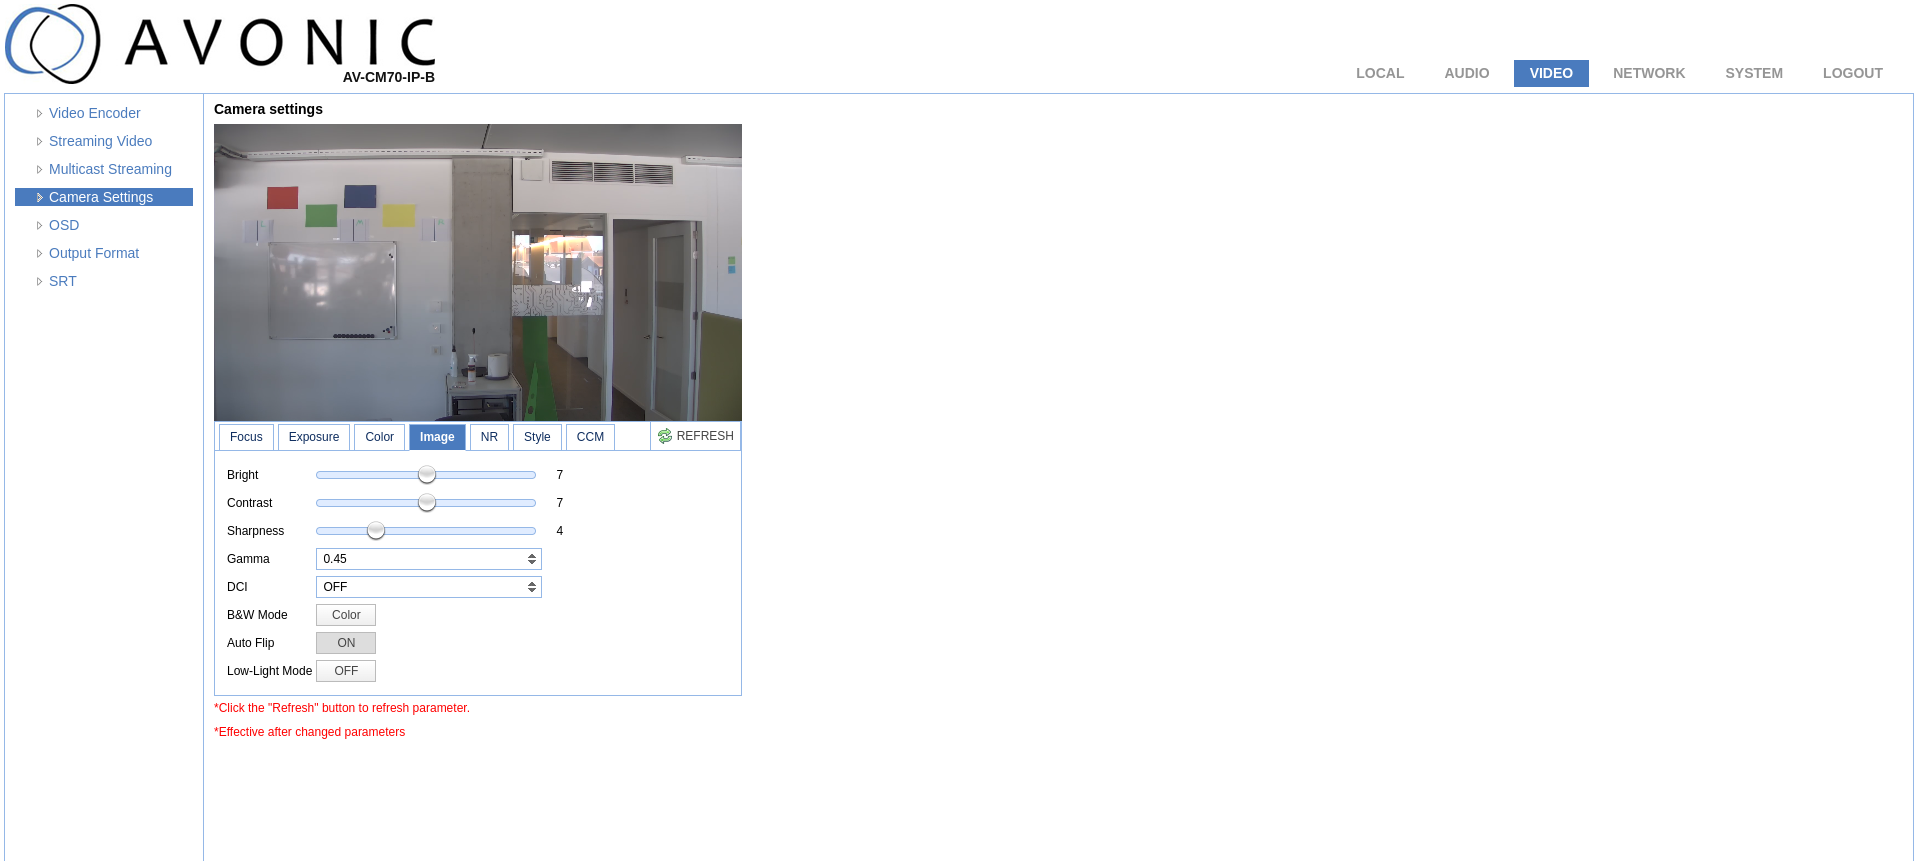
4. Configure the camera settings:
- Click on the Video tab in the top right menu of the page.
- Click on Camera Settings in the left menu.
- Click on Image in the menu under the preview.
- Make sure Audio Flip is set on ON.
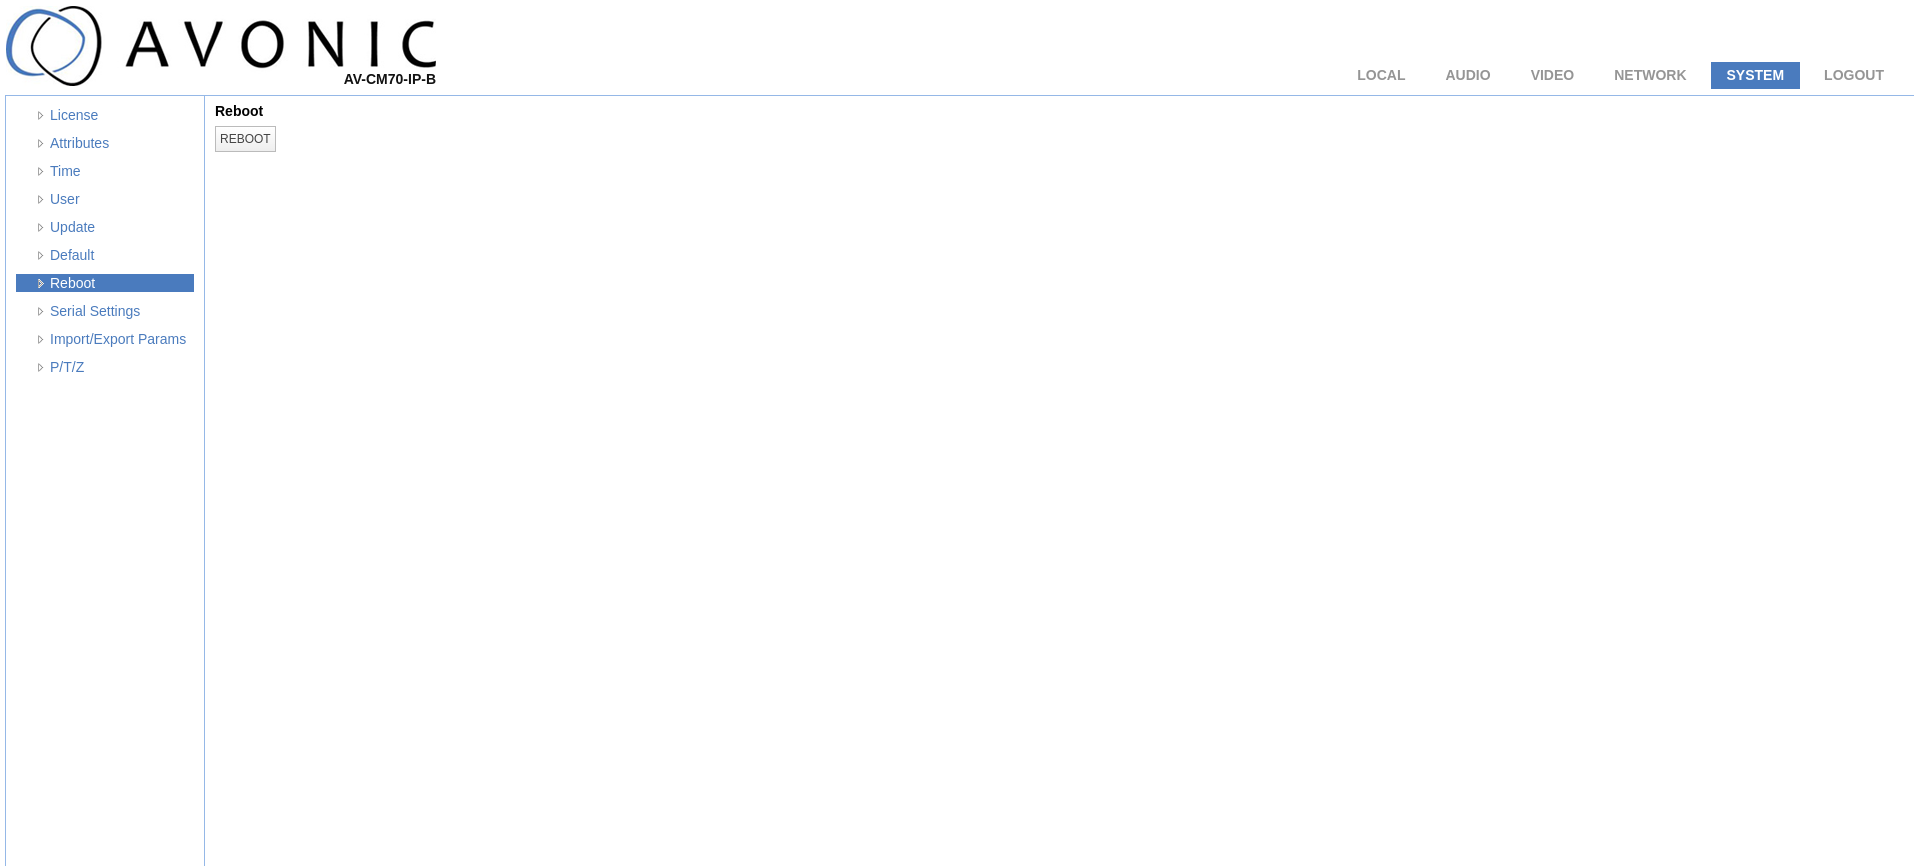
5. Reboot the camera:
- Click on the System tab in the top right menu of the page.
- Click on Reboot in the left menu.
- Click on the Reboot button.
6. Firmware:
- The Avonic CM70 camera has only been validated with the firmware here-below:

⚠️ To avoid detection issues, make sure to power on the cameras first and leave them on for a few seconds before powering on the Gateway.
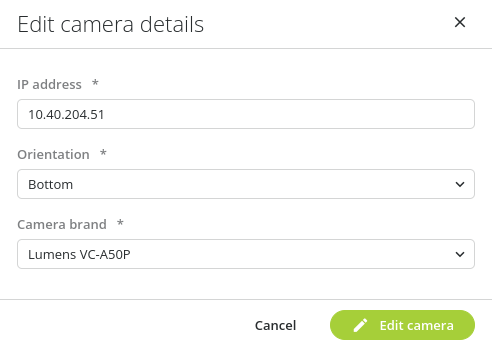
1. Add the camera in the Room Layout:
- Enter the IP address of the camera.
- Select the orientation of the camera (all orientations are supported).
- Select the following camera brand: Lumens VC-A50P.
2. Go to the website of the camera:
- Enter the following URL in the address bar: http://10.40.204.51/
- Enter the default login credentials:
- Username: admin
- Password: 9999
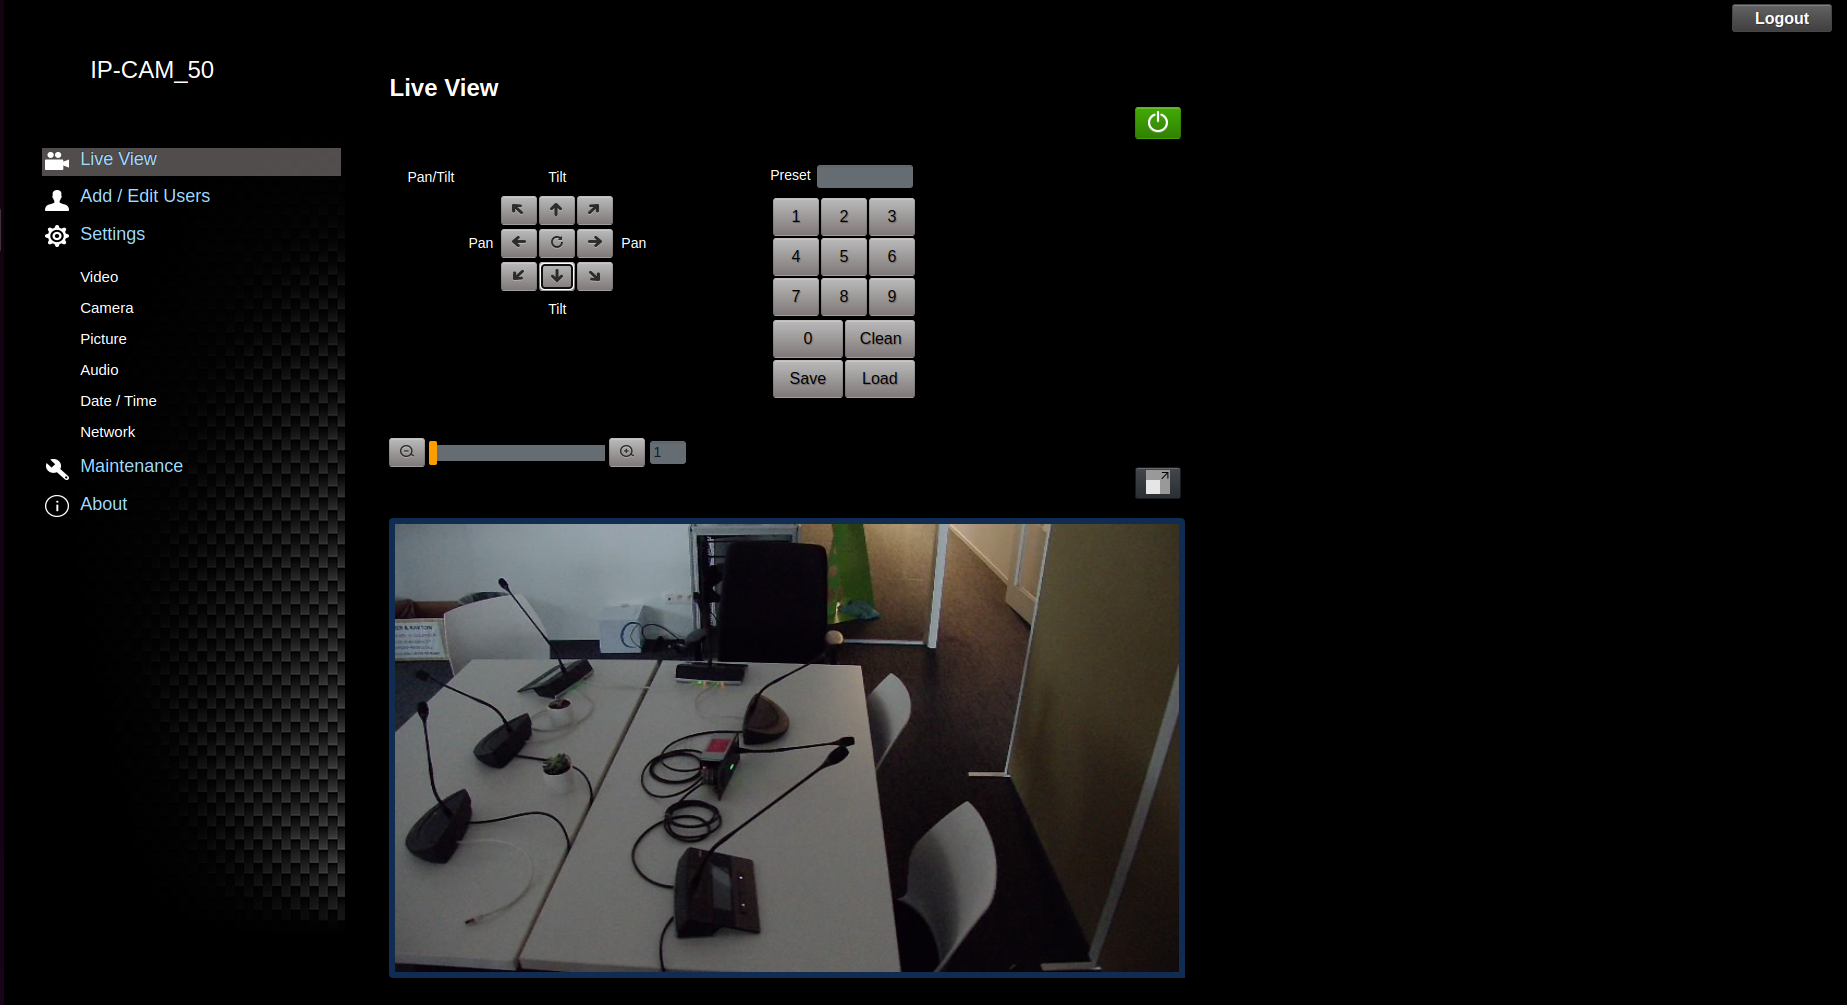
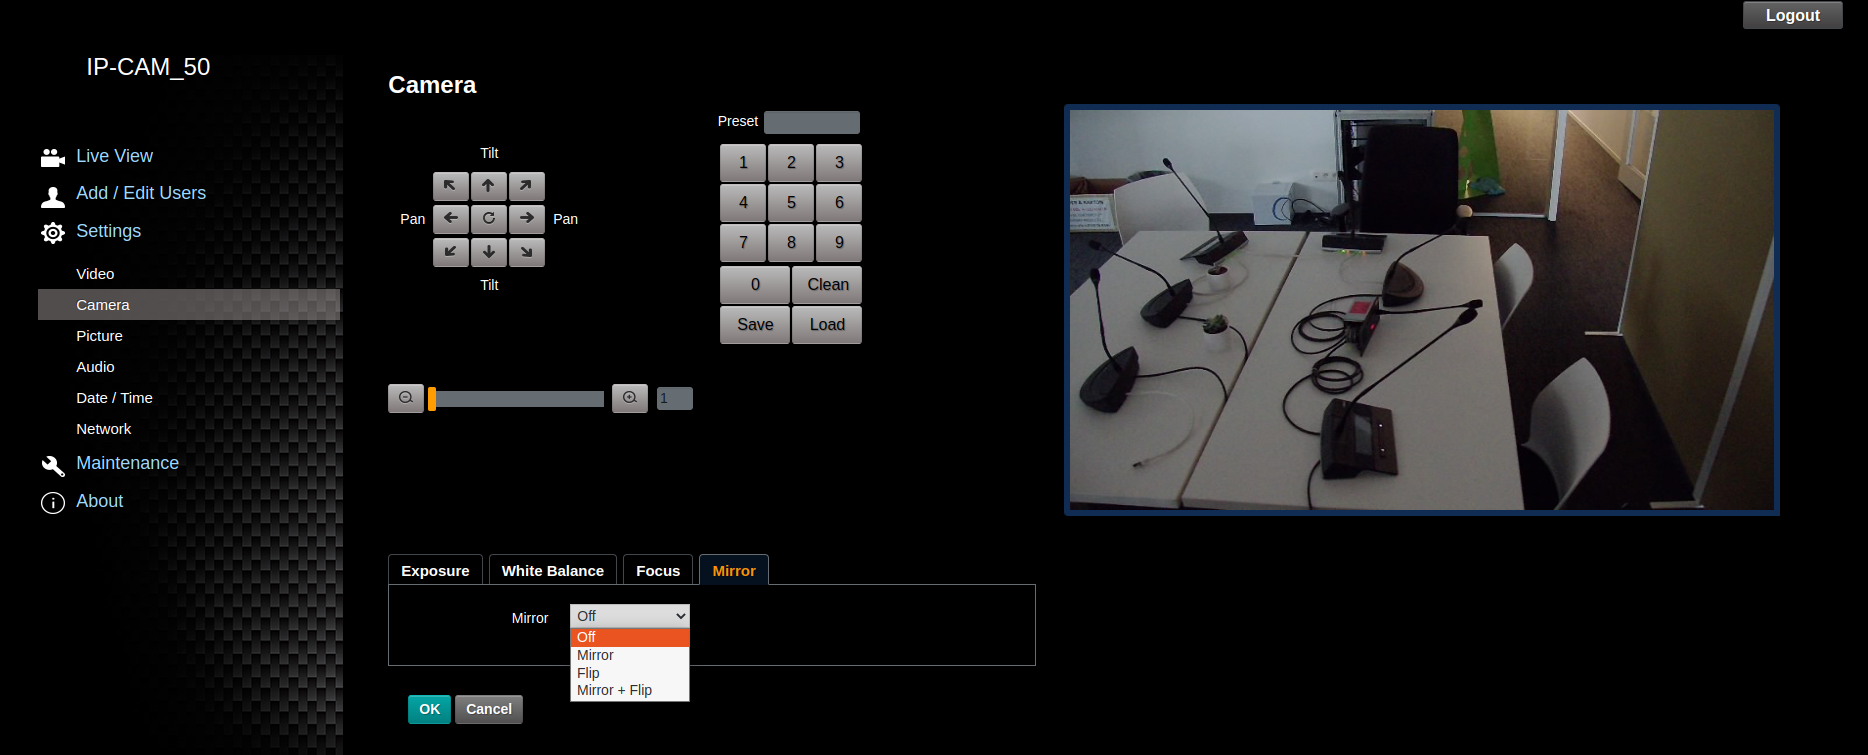
- The page here-below appears, and you should get a video preview.
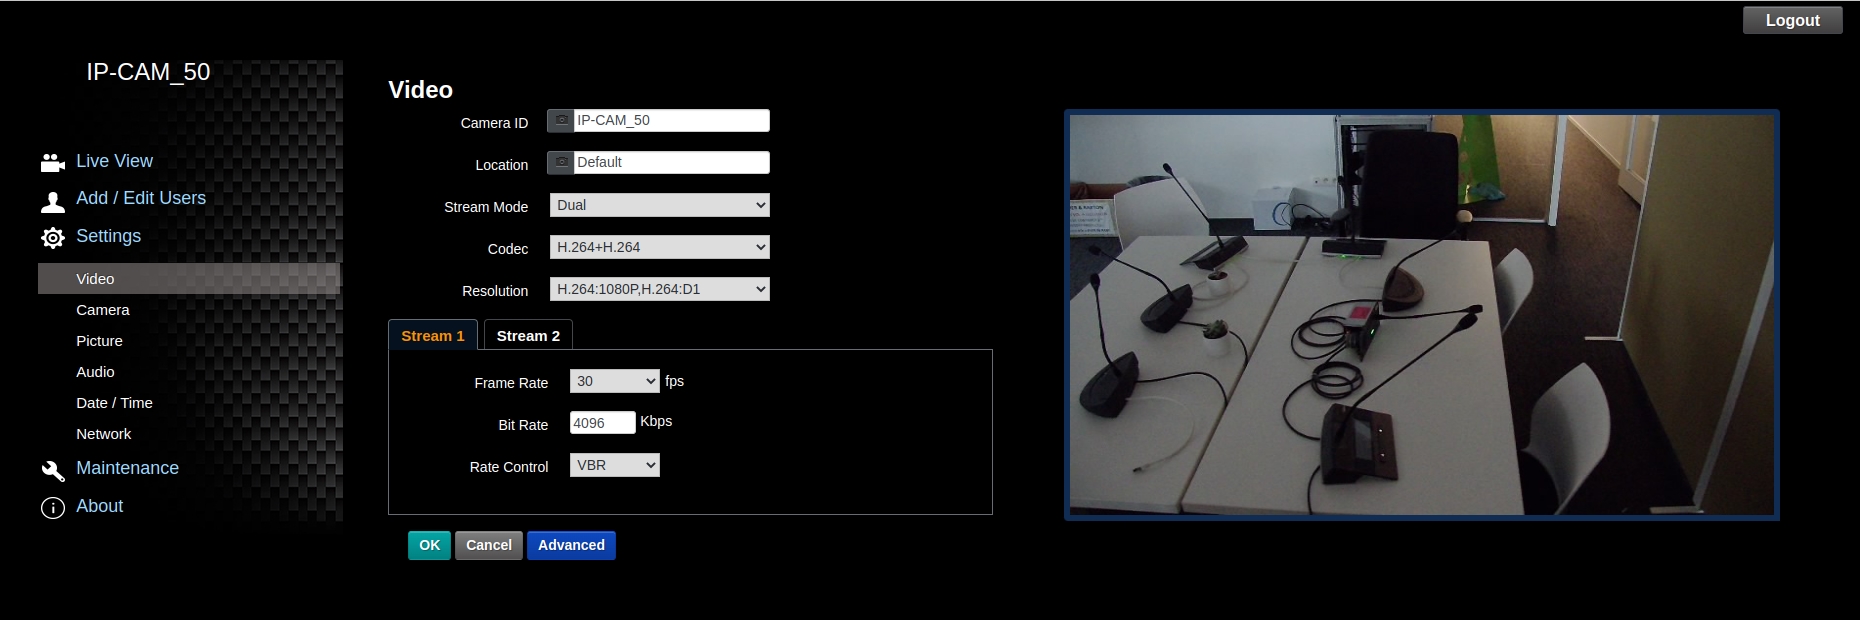
3. Configure the video settings:
- Click on the Video tab in the left menu of the page.
- Make sure that all the settings are the same as in the screenshot here below:
4. Configure the camera settings:
- Click on the Camera tab in the left menu of the page.
- Click on the Mirror tab in the bottom menu.
- For upside-down orientation, select Mirror + Flip.
- For normal/bottom orientation, select Off.

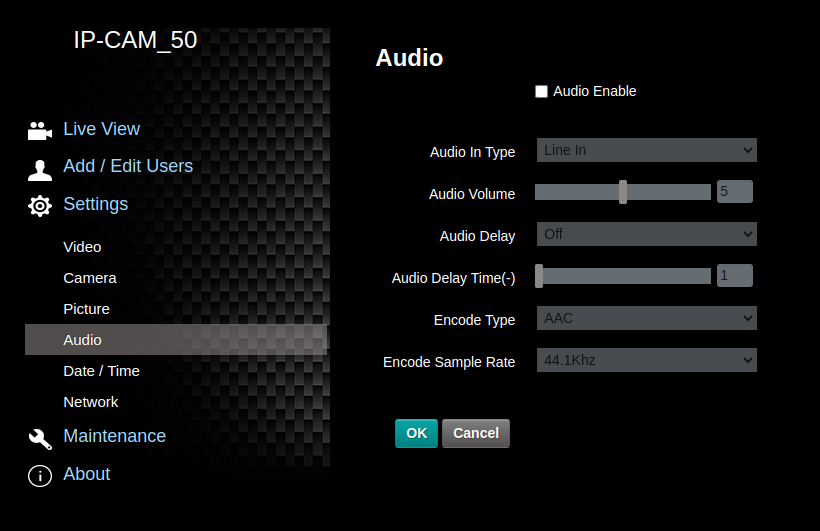
5. Disable audio:
- Click on the Audio tab in the left menu of the page.
- Uncheck Audio Enable.
6. Reboot the camera.
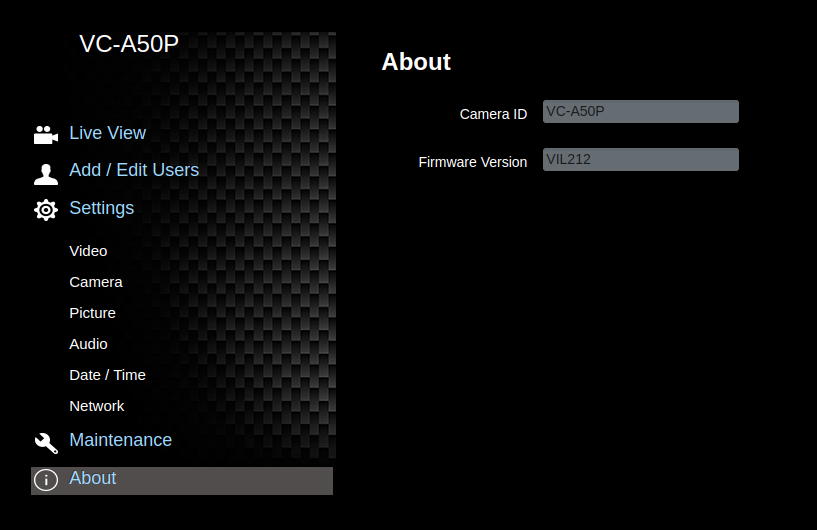
7. Firmware version:
- Click on the About tab in the left menu of the page to check the firmware version of your camera.
⚠️ To avoid detection issues, make sure to power on the cameras first and leave them on for a few seconds before powering on the Gateway.
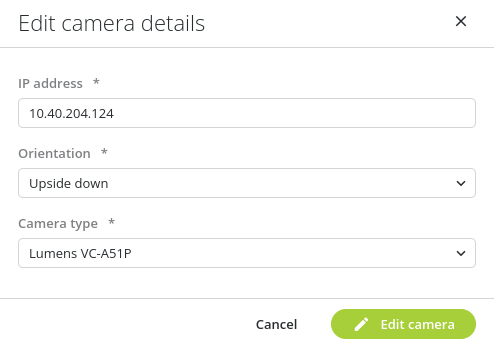
1. Add the camera in the Room Layout:
- Enter the IP address of the camera.
- Select the orientation of the camera (all orientations are supported).
- Select the following camera brand: Lumens VC-A51P.
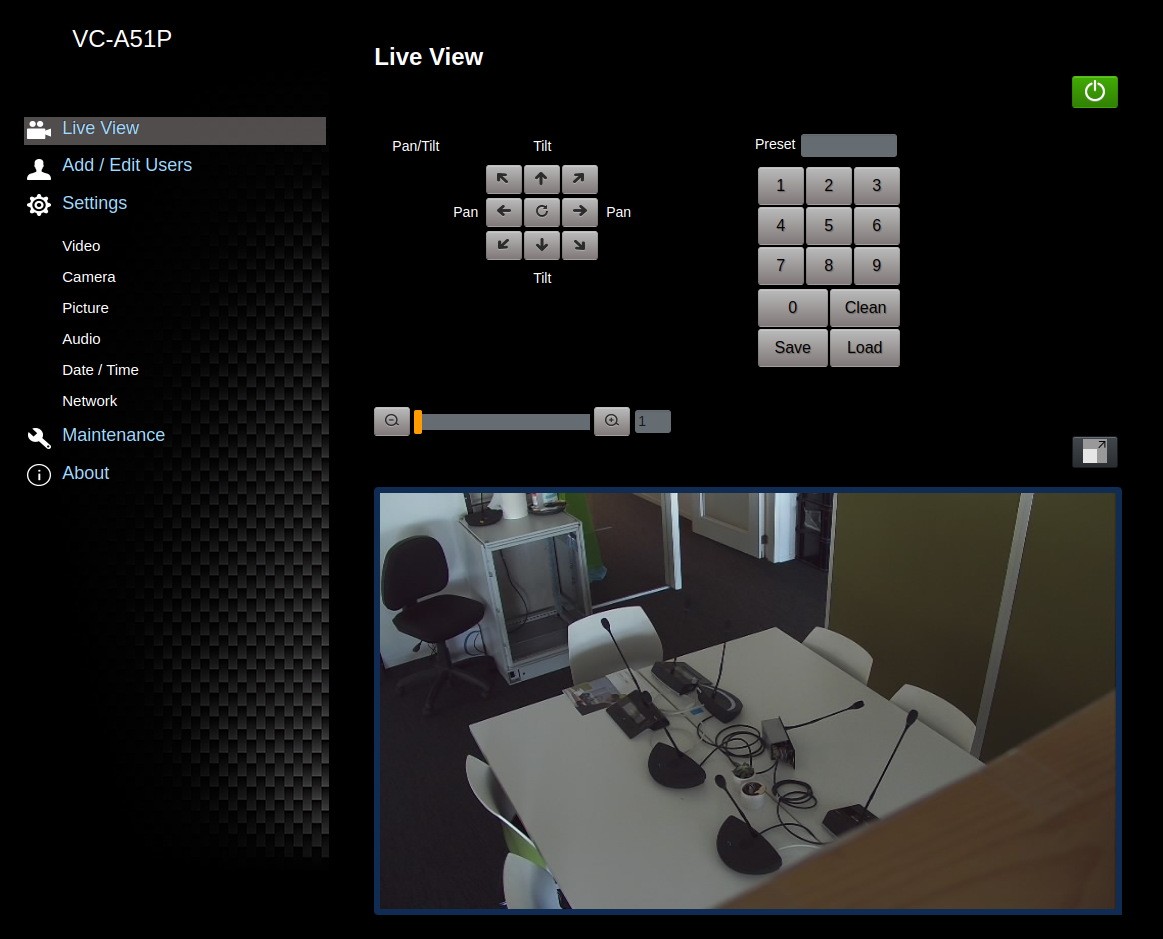
2. Go to the website of the camera:
- Enter the following URL in the address bar: http://10.40.204.124/
- Enter the default login credentials.
- Username: admin
- Password: 9999
- The page here-below appears, and you should get a video preview.
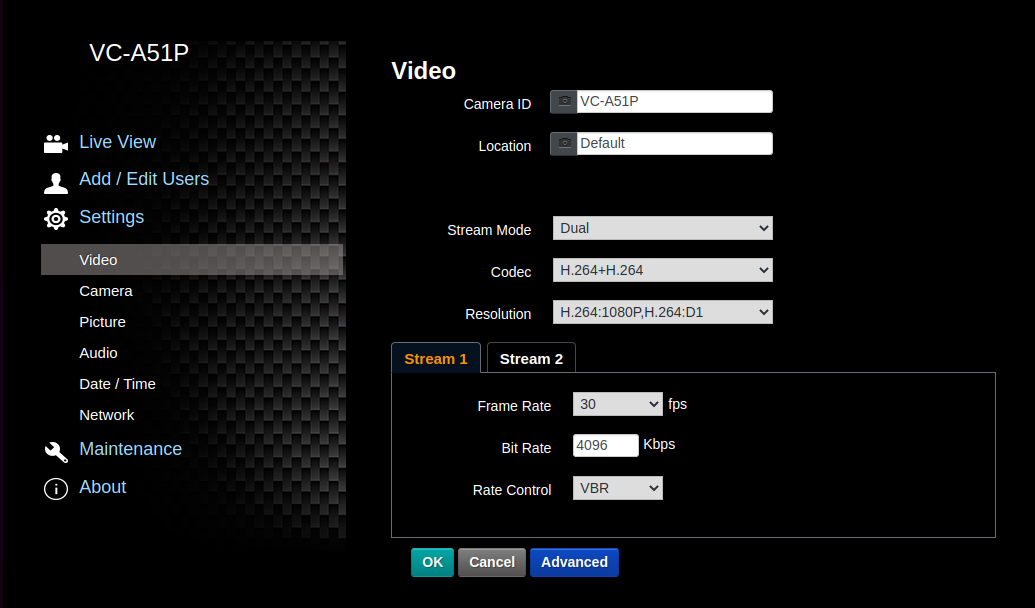
3. Configure the video settings:
- Click on the Video tab in the left menu of the page.
- Make sure that all the settings are the same as in the screenshot below.
4. Configure the camera settings:
- Click on the Camera tab in the left menu of the page.
- Click on the Mirror tab in the bottom menu.
- For upside-down orientation, select Mirror + Flip.
- For normal/bottom orientation, select OFF.
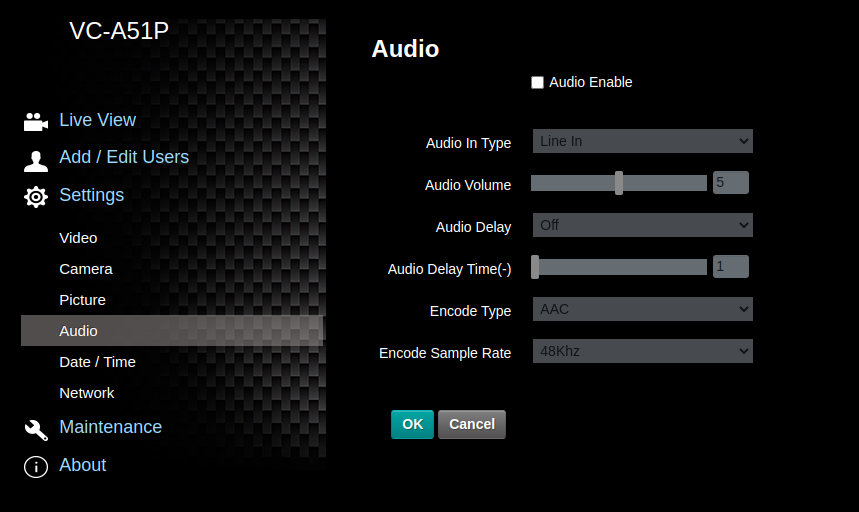
5. Disable audio:
- Click on the Audio tab in the left menu of the page.
- Uncheck Audio Enable.
6. Reboot the camera.
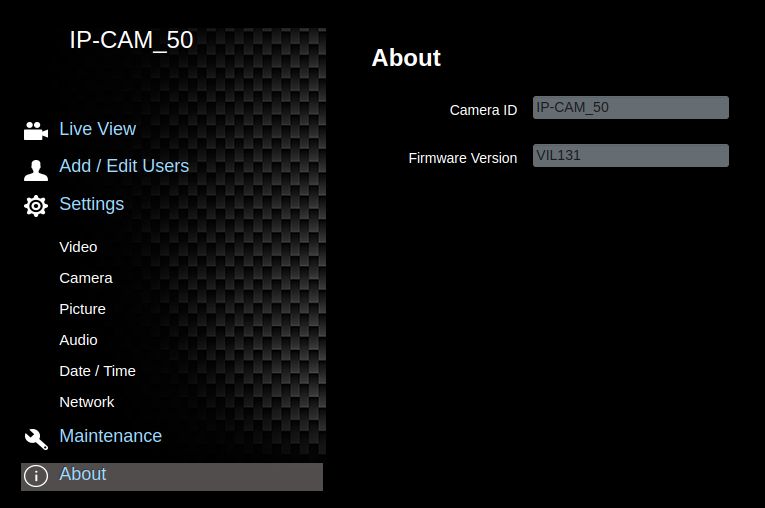
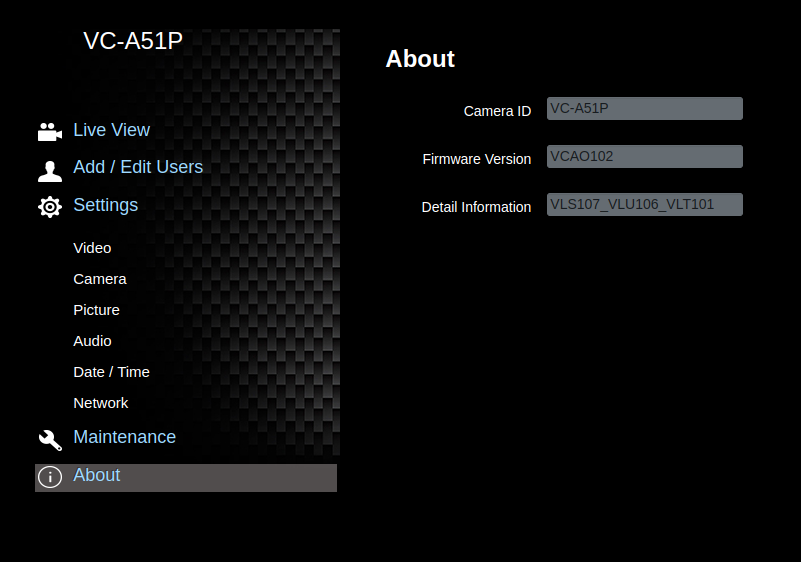
7. Firmware version:
- Click on the About tab in the left menu of the page to check the firmware version of your camera.
- The Lumens camera has only been validated with the firmware indicated in the screenshot below.
⚠️ To avoid detection issues, make sure to power on the cameras first and leave them on for a few seconds before powering on the Gateway.
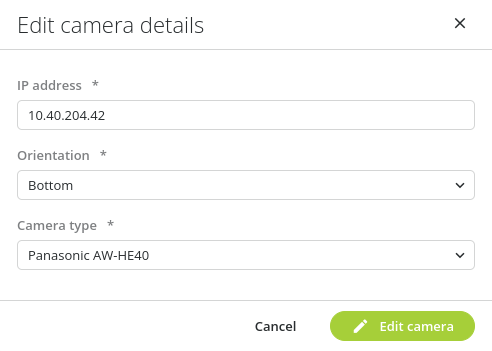
1. Add the camera in the Room Layout:
- Enter the IP address of the camera.
- Select the orientation of the camera (all orientations are supported).
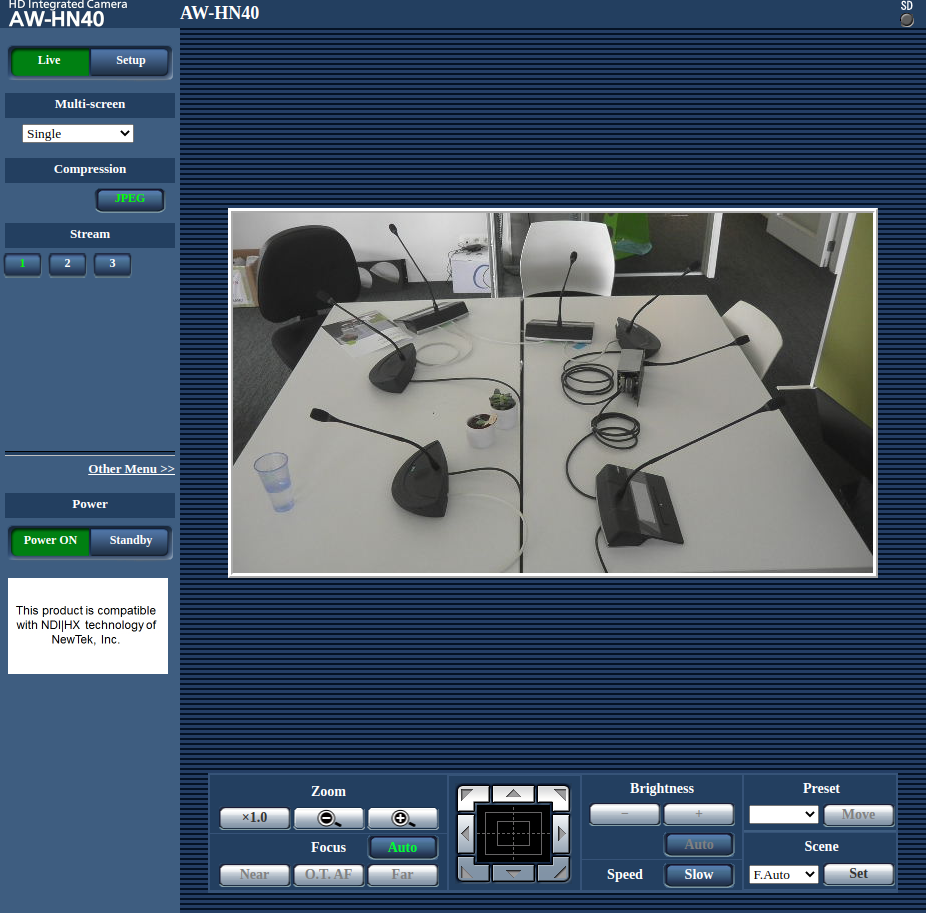
- Select the following camera brand: Panasonic AW-HE40 or AW-HN40.
2. Go to the website of the camera:
- Enter the following URL in the address bar: http://10.40.204.42/
- The page below appears, and you should get a video preview.
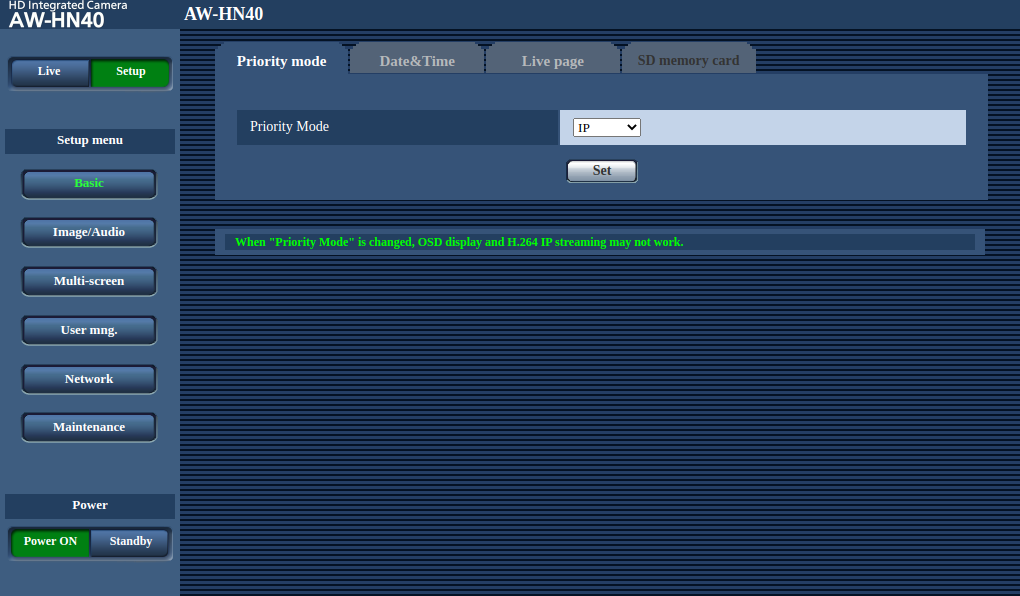
3. Enter the default credentials of the camera:
- Click on the Setup tab in the left menu.
- Enter the default login credentials:
- Username: admin
- Password: 12345
- Click on Power ON at the bottom of the left menu.
- Set the priority to IP.
- Click on the Set button to save the settings.
4. Configure the video settings:
- Click on Image/Audio in the left menu.
- Click on the Video over IP tab on top of the page.
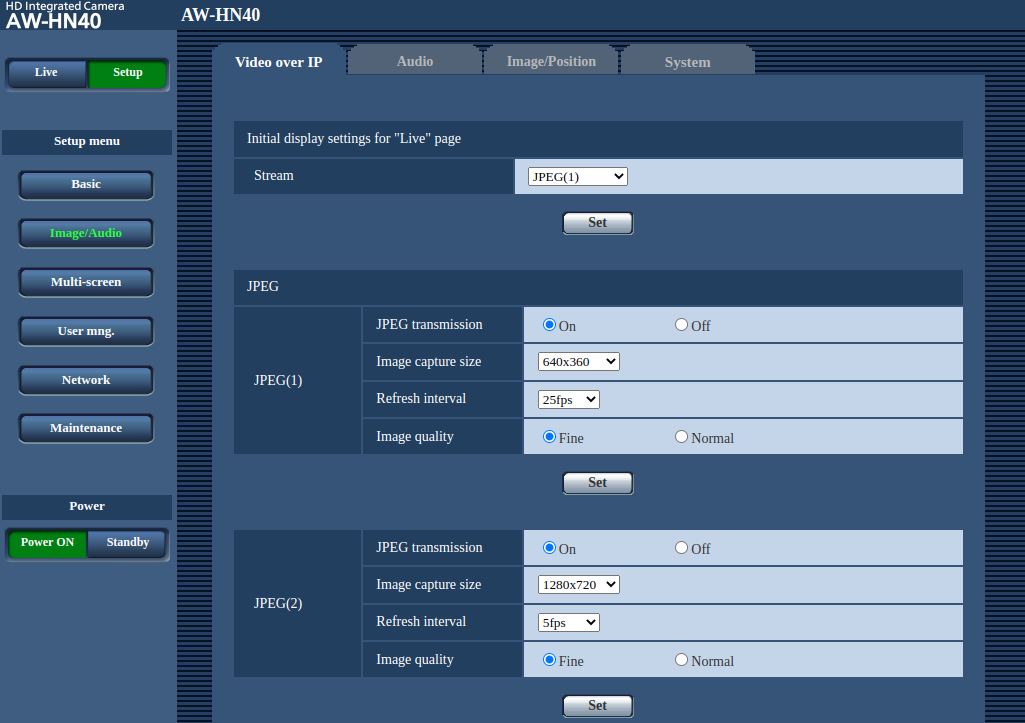
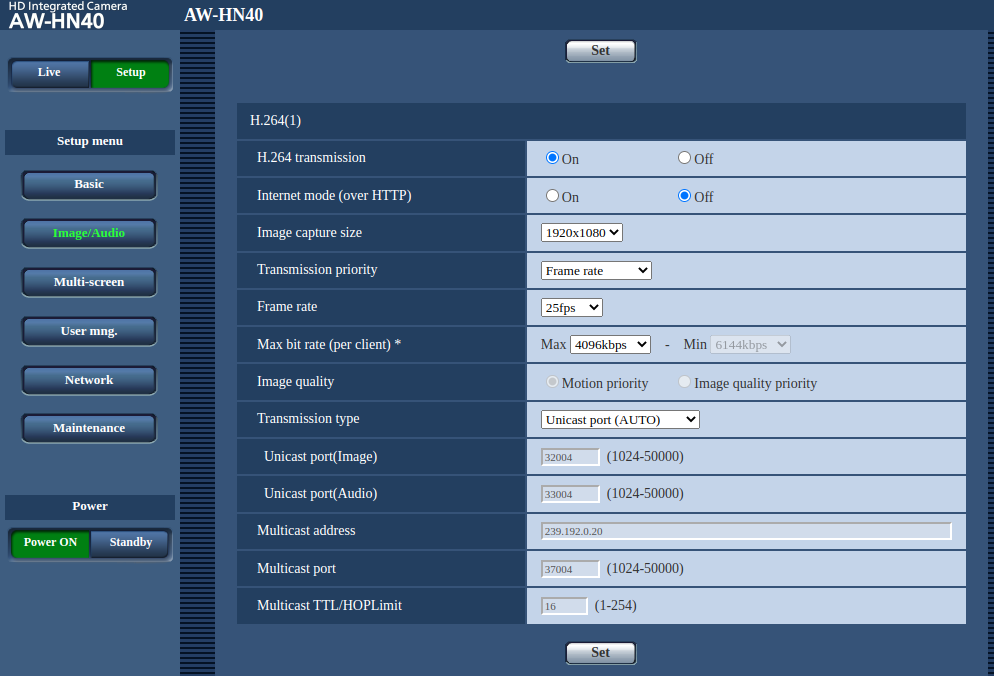
- Scroll down to H.264(1).
- Make sure that all the settings of that section are the same as in the screenshot opposite.
- Click on the Set button under the H.264(1) section to save the settings.
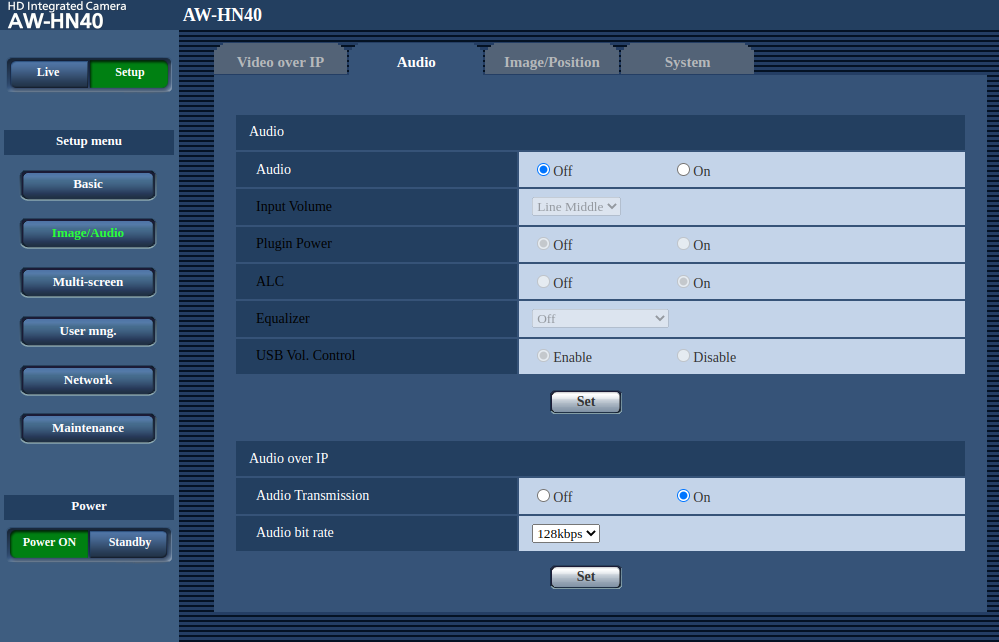
5. Configure the audio settings:
- Click on Image/Audio in the left menu.
- Click on the Audio tab on top of the page.
- Make sure that the Audio is set to Off.
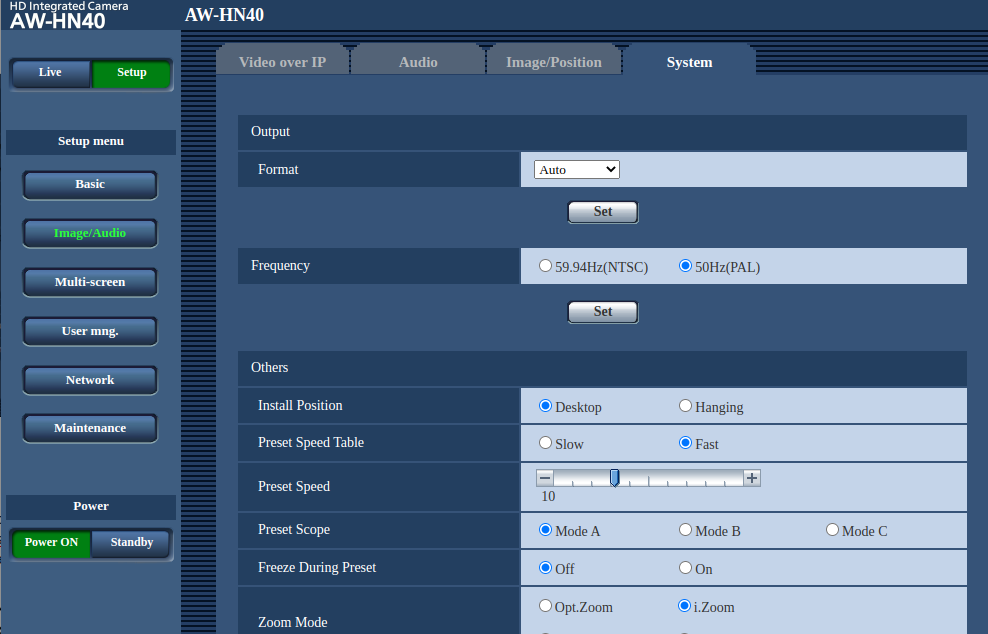
6. Configure the camera settings:
- Click on Image/Audio in the left menu.
- Click on the System tab on top of the page.
- Scroll down to the Others section and set the Install Position as follows:
- Desktop for normal position.
- Hanging for upside down position.
- Click on the Set button under the Others section to save the settings.
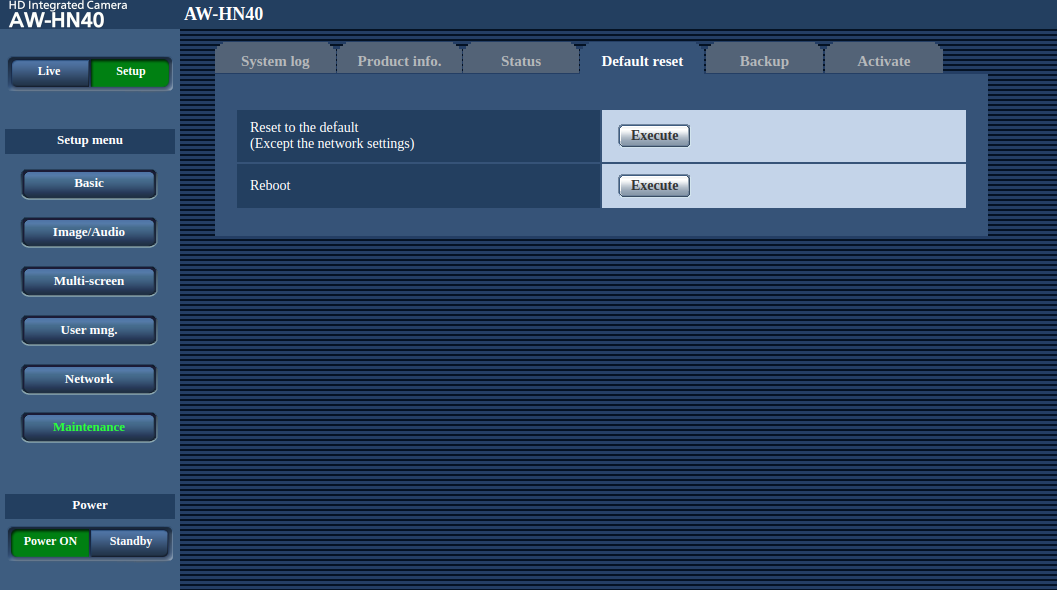
7. Reboot the camera:
- Click on Maintenance in the left menu.
- Click on the Default reset tab on top of the page.
- In the Reboot section, click on the Execute button.
- Confirm the reboot request.
⚠️ To avoid detection issues, make sure to power on the cameras first and leave them on for a few seconds before powering on the Gateway.
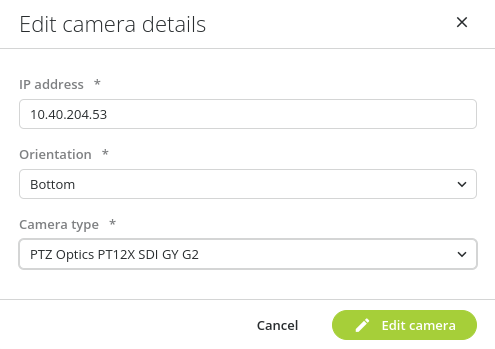
1. Add the camera in the Room Layout:
- Enter the IP address of the camera.
- Select the orientation of the camera (all orientations are supported).
- Select the following camera brand: PTZ Optics PT12X SDI GY G2.
2. Go to the website of the camera:
- Enter the following URL in the address bar: http://10.40.204.53/
- Enter the default login credentials.
- Username: admin
- Password: admin
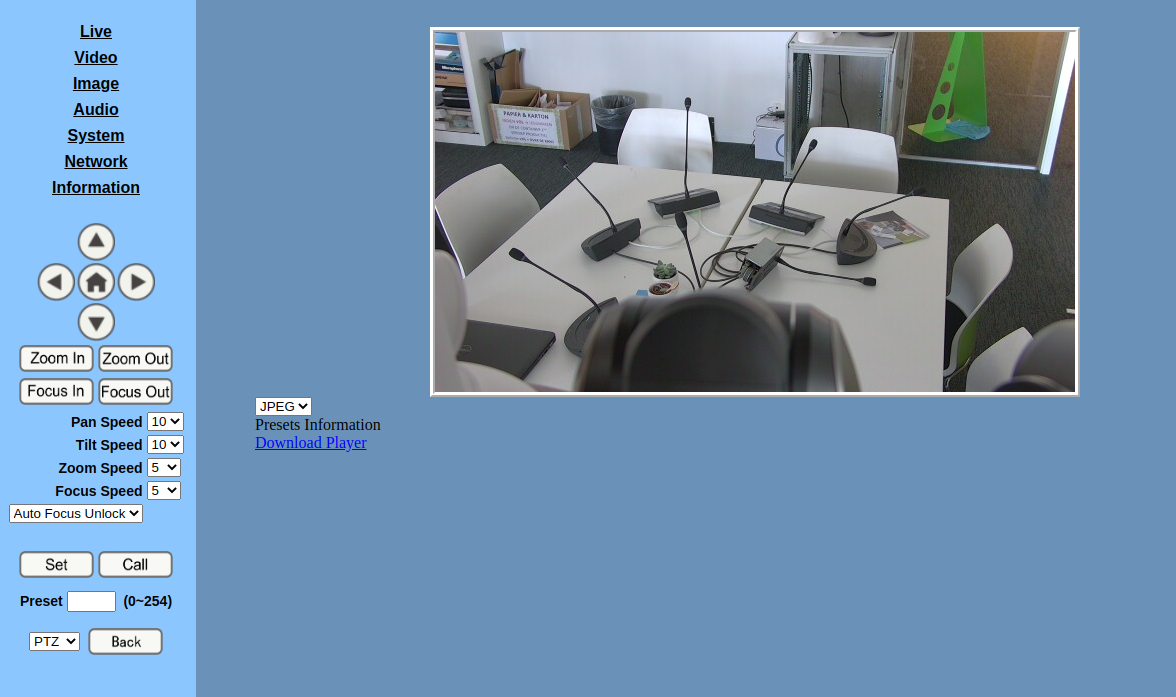
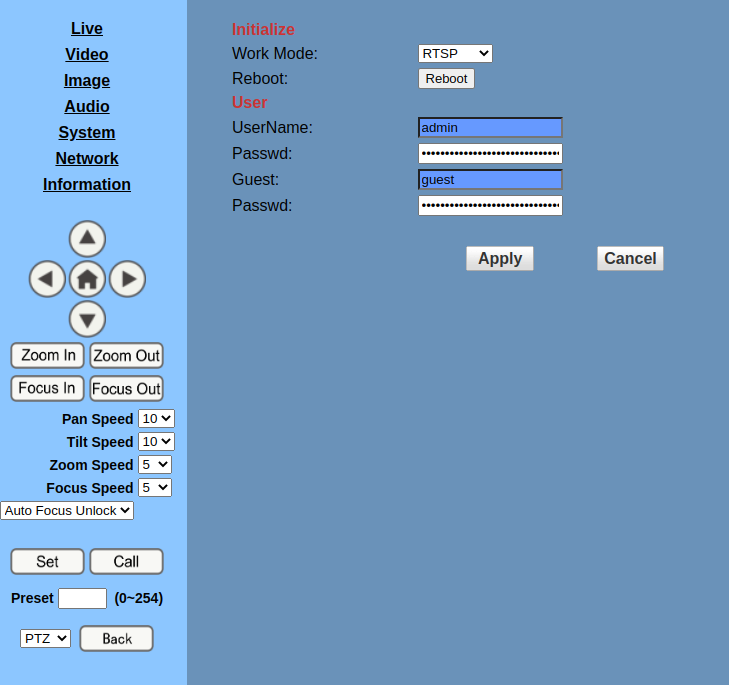
- The page here-below appears, and you should get a video preview.
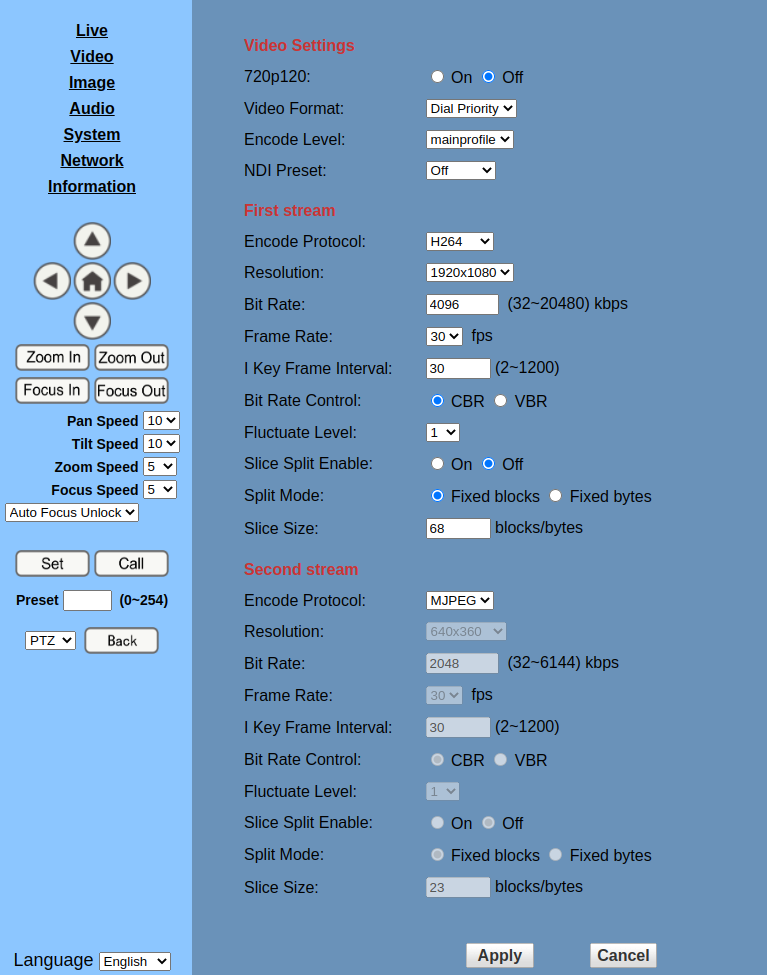
3. Configure the video settings:
- Click on Video in the left menu of the page.
- Make sure that all the settings are the same as in the screenshot below.
- Click on Apply if changes have been made.
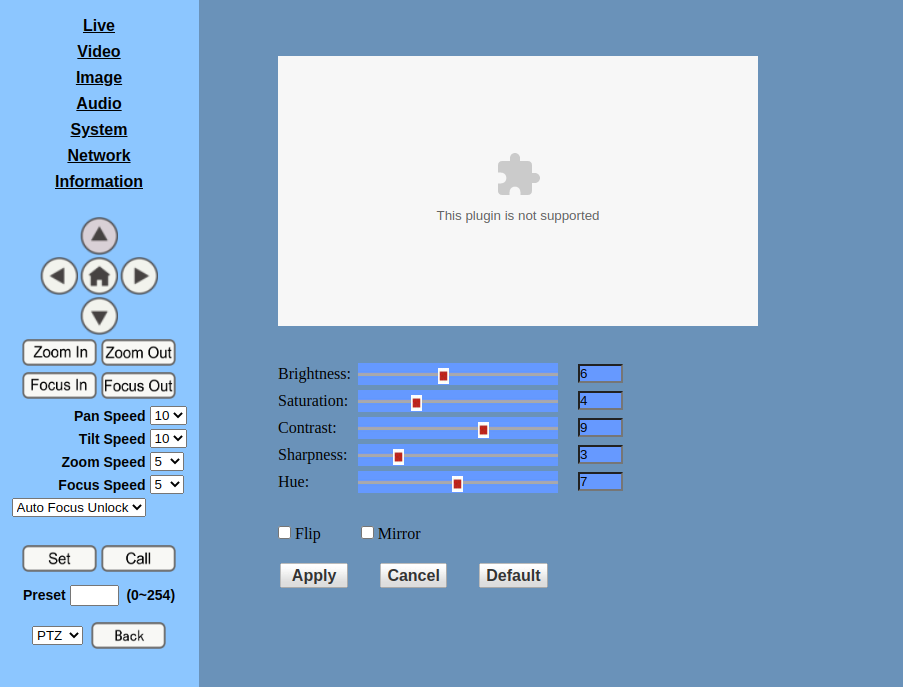
4. Configure the camera settings:
- Click the Camera tab in the left menu of the page.
- For upside-down orientation, select both Flip and Mirror.
- For upside-down orientation, unselect both Flip and Mirror.
- Click on Apply if changes have been made.
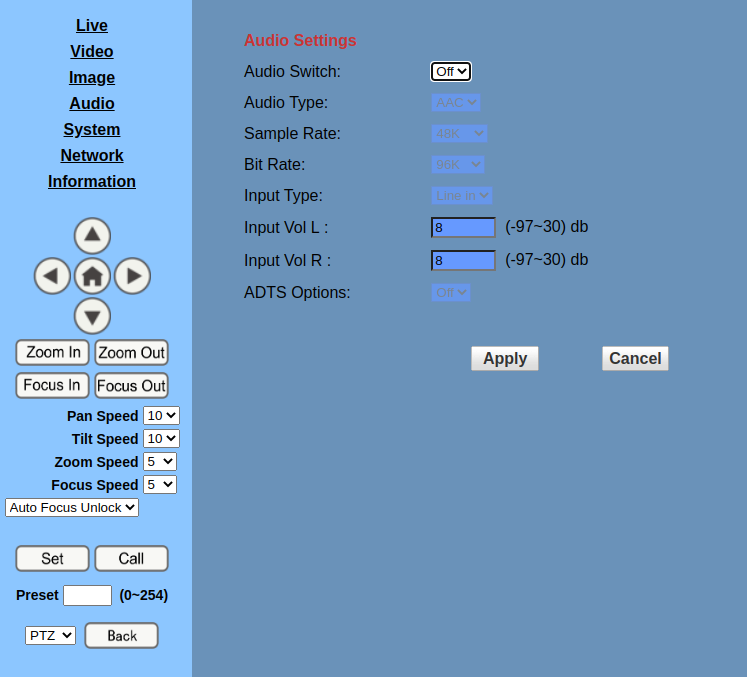
5. Disable audio:
- Click on Audio in the left menu of the page.
- Set Audio Switch to Off.
- Click on Apply if changes have been made.
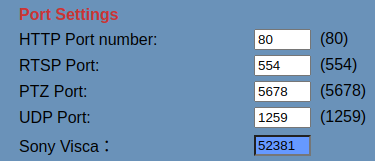
6. Configure the network settings:
- Click on Network in the left menu of the page.
- Make sure that all the settings are the same as in the screenshot opposite.
7. Reboot the camera:
- Click on System in the left menu of the page.
- Click on Reboot.
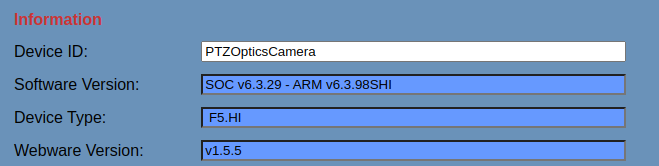
8. Firmware version:
- Click on Information in the left menu of the page to check the firmware version of your camera.
- The PTZ Optics camera camera has only been validated with the firmware indicated in the screenshot below.