You can prepare a meeting on the fly or after creating a meeting template.
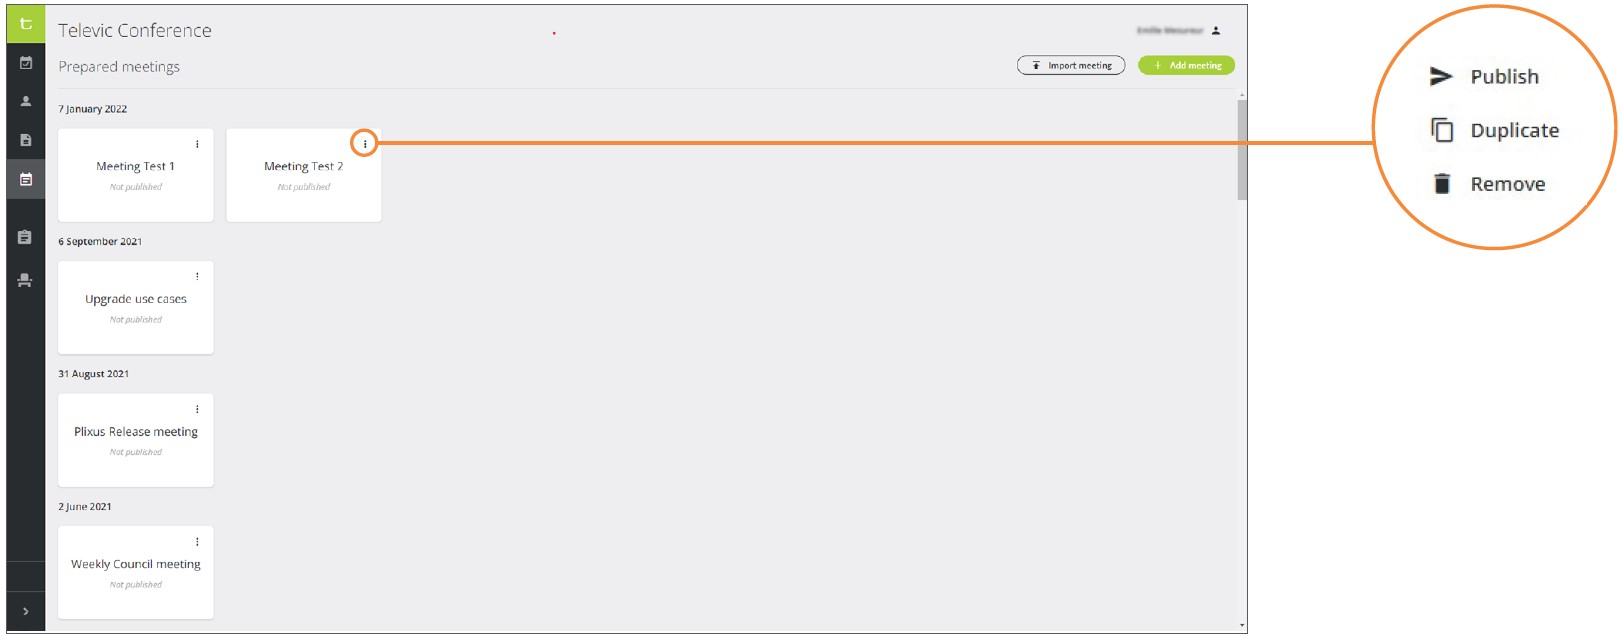
In the left vertical panel of your dashboard, click on the Prepared Meetings icon to access the list of prepared meetings.
Prepared Meetings Overview
Import Prepared Meetings From Another System
In case meetings have been prepared in a different system than Confero, it is possible to import them to Confero’s list of Prepared Meetings by uploading a JSON file (.json).
💡 JSON is an open standard file format and data interchange format that uses human-readable text. When importing it into Confero, it will then have to contain all of the necessary parts of a meeting (participants, agenda, etc.). It will be possible to edit/add information about the meetings in Confero after importing.
💡 Contact your system administrator to get access to the JSON file.
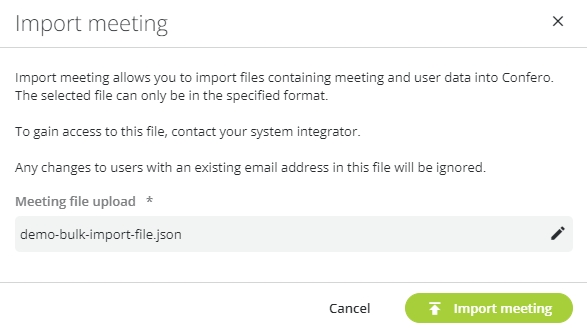
1. To import new meetings in the list of prepared meetings, click on in the top right corner of the page. The following window pops up:
2. Drag and drop the JSON file, or upload it from your computer, in the field below Meeting file upload.
3. Click on to upload the file.
4. Once the upload is finished, a message saying “Your meeting and users have been imported successfully” appears, and the imported meetings are automatically added to the list of prepared meetings.
5. To edit an imported meeting, click on it in the list and follow the steps indicated in the section below.
Prepare a New Meeting
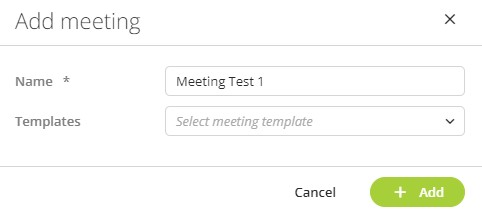
1. To add a meeting in the list of prepared meetings, click on in the top right corner of the Prepared Meetings window. The following popup window opens:
2. Fill in the name of the new meeting, choose a template (optional) and click on to confirm. Your new meeting is added to the list of prepared meetings.
👉 If you have selected a meeting template, some information about the prepared meeting will already be prefilled (general information, participants, seating). These information can easily be edited.
Enter General Information
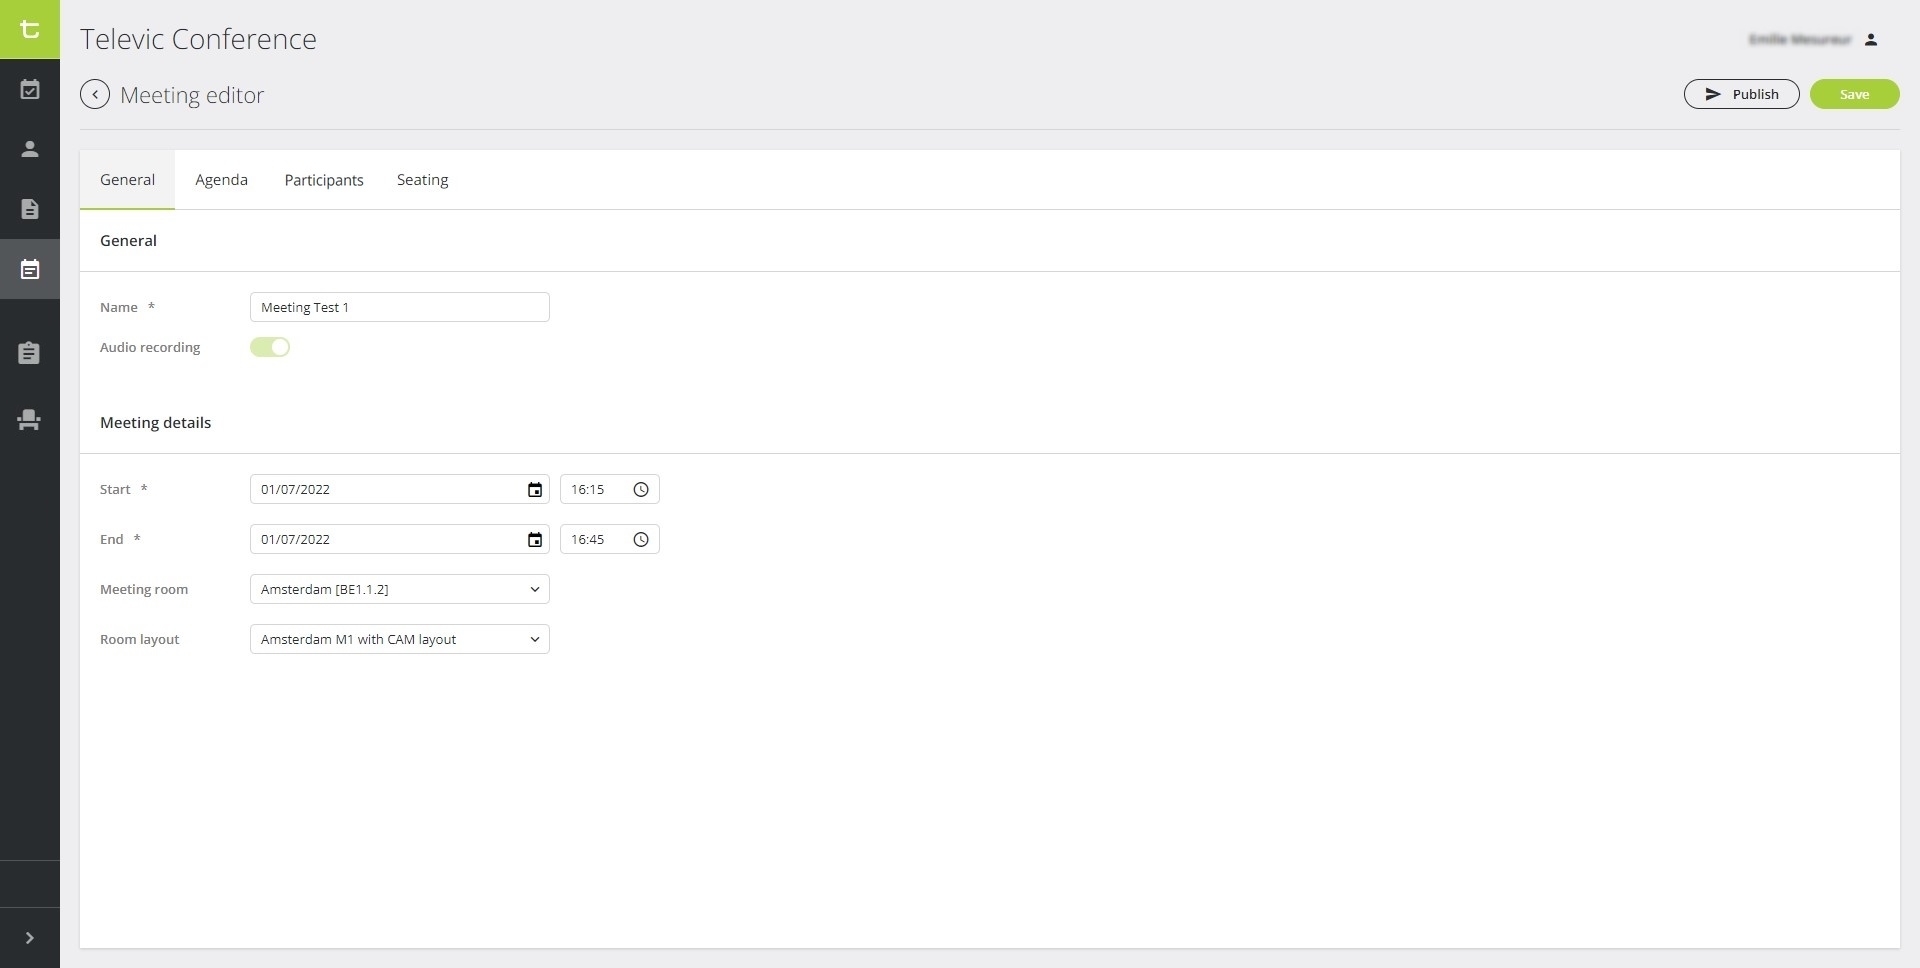
1. In the list of prepared meetings, click on the meeting of your choice. The following window opens:
2. In the General tab, enter the general information of the meeting: name, audio recording, date, time, meeting room, room layout.
Set Speech Timers (Requires CRP 7.6)
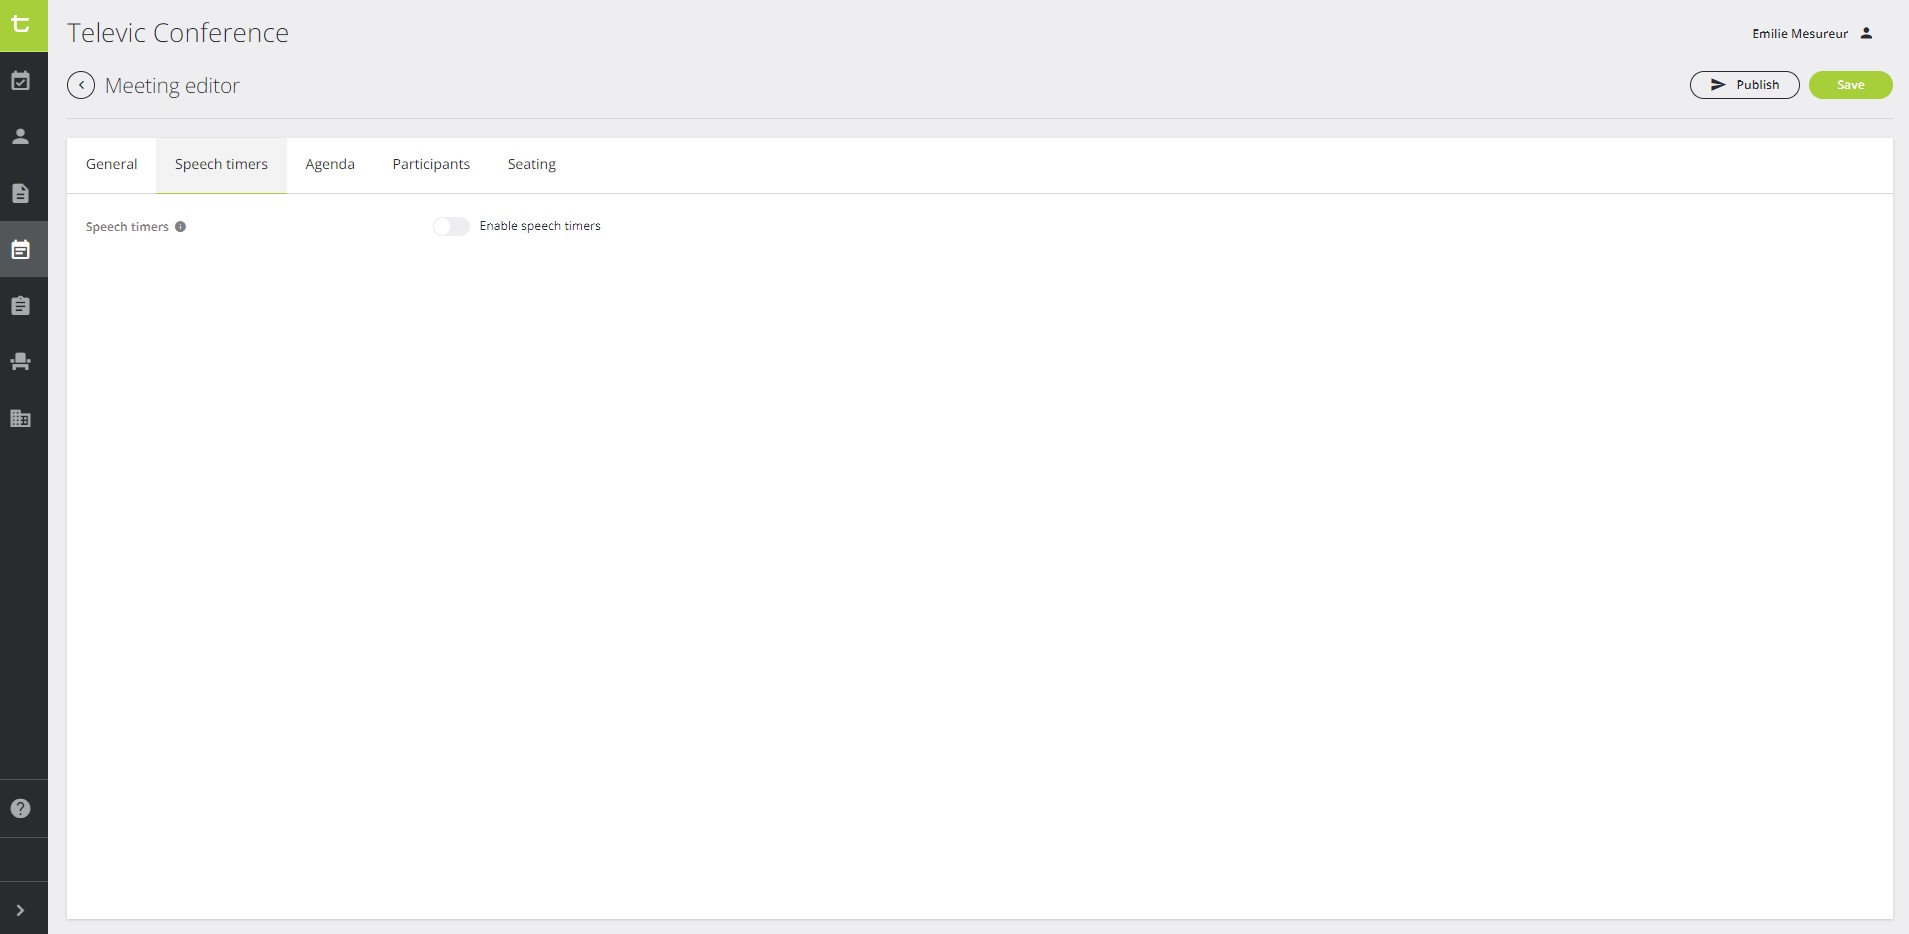
In the Speech Timers tab, you can add speech timers for the participants during the meeting.
1. Slide the cursor to the right to enable speech timers:
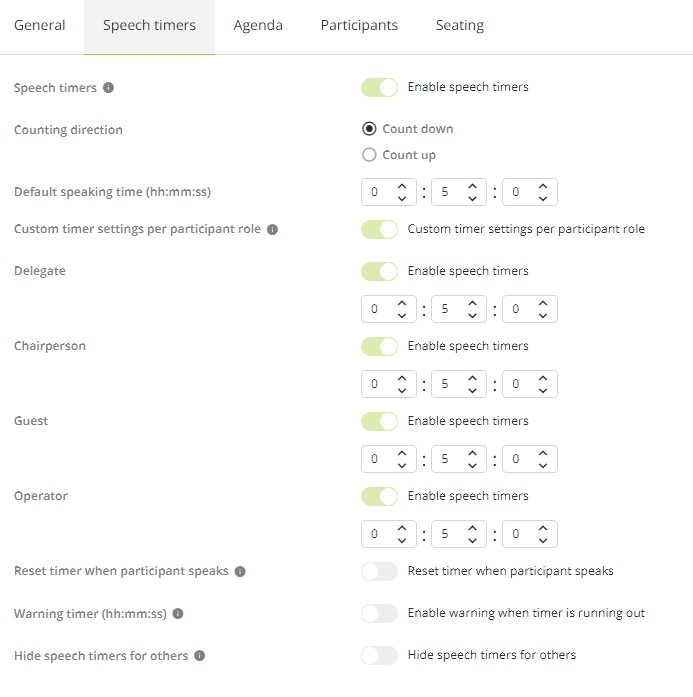
2. Define the settings:
- Counting direction: count down or count up,
- Default speaking time,
- Custom timer settings per participant role: you can assign a different default speaking time depending on the roles of the participants. All participants with the same role will have the same default speaking time.
- Reset time: the participants’ speech timers will refresh to the default speaking time every time they enter the speakers list,
- Warning timer: the speakers will get a warning on the screen when their speaking time is almost over,
- Hide speech timers from others: only the current speaker and the participants with meeting control will be able to see the timers.
👉 During the meeting, the chairpersons and operators will be able to control the speech timers by pausing, resuming and editing them all or individually.
Fill in the Agenda
Add a Discussion Item
1. Select the Agenda tab and click on ![]() .
.
2. The discussion item fields open at the bottom of the page:
3. Enter a title and a description (optional), and click on . The new discussion item is added to the agenda:
Add a Voting Item
1. Select the Agenda tab and click on ![]() .
.
2. The voting item fields open at the bottom of the page:
3. Enter the appropriate information about the voting item:
- In General, enter a title and a description (optional).
- In Choices, enter the desired voting choices as well as the color and sign (optional). You can add extra choices by clicking on the + sign.
- In Options, enable or disable the result options. You can hide the individual results (secret voting) or hide the results while the vote is in progress to avoid voters from being influenced by each other.
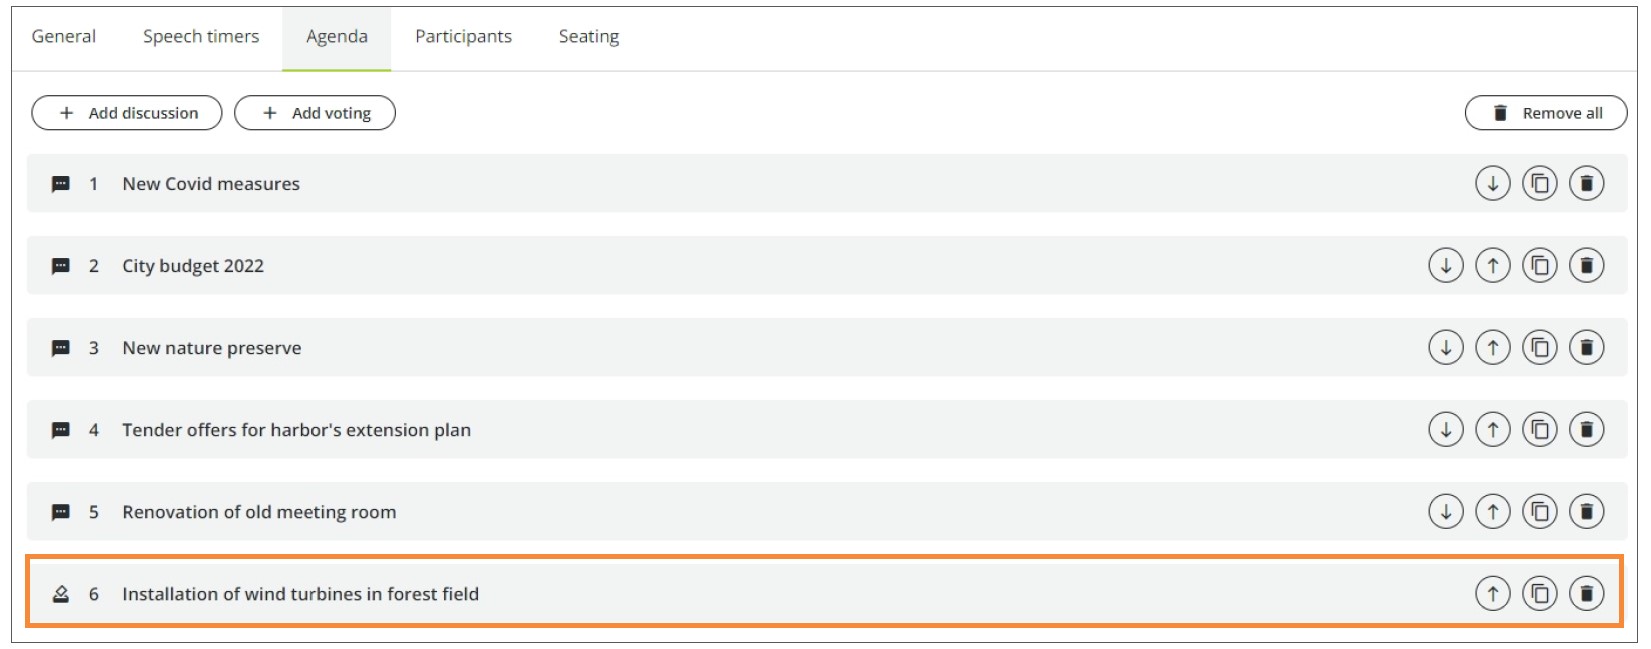
4. Click on . The new voting item is added to the agenda.
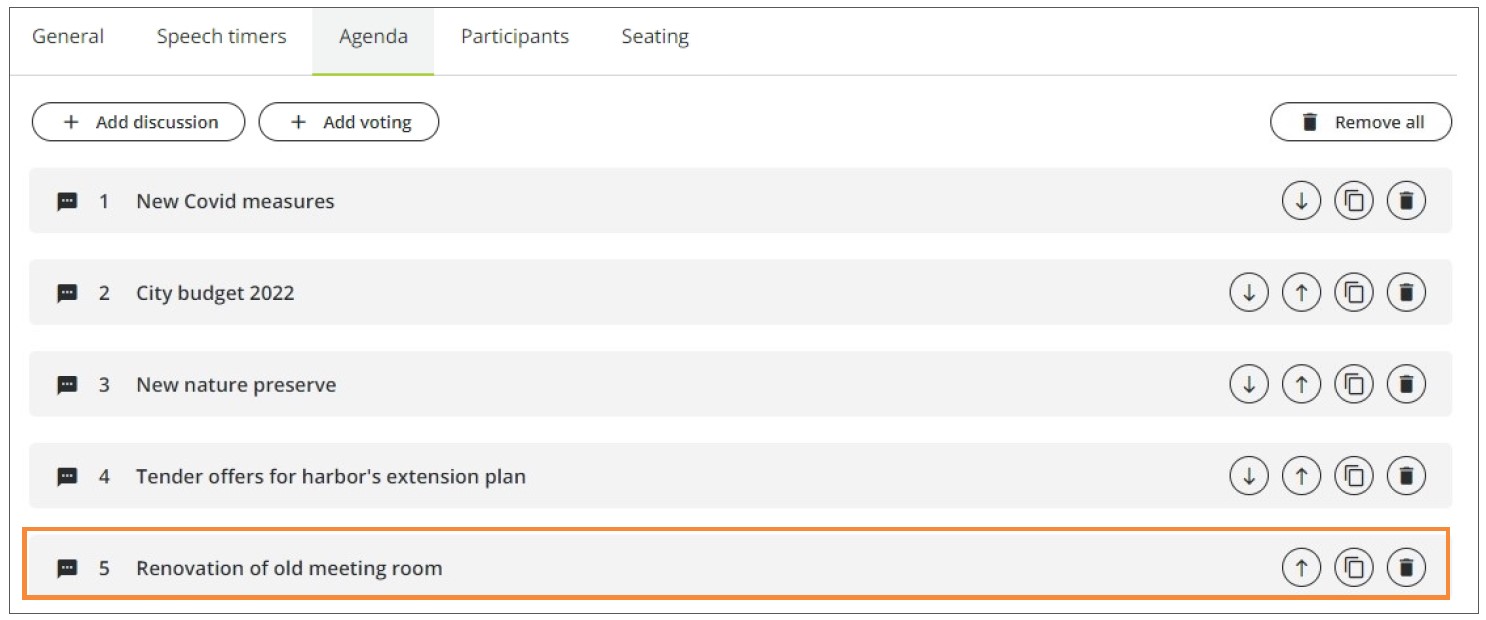
👉 You can use the following icons to rearrange the order of the agenda items, duplicate them or delete them.
Select Participants
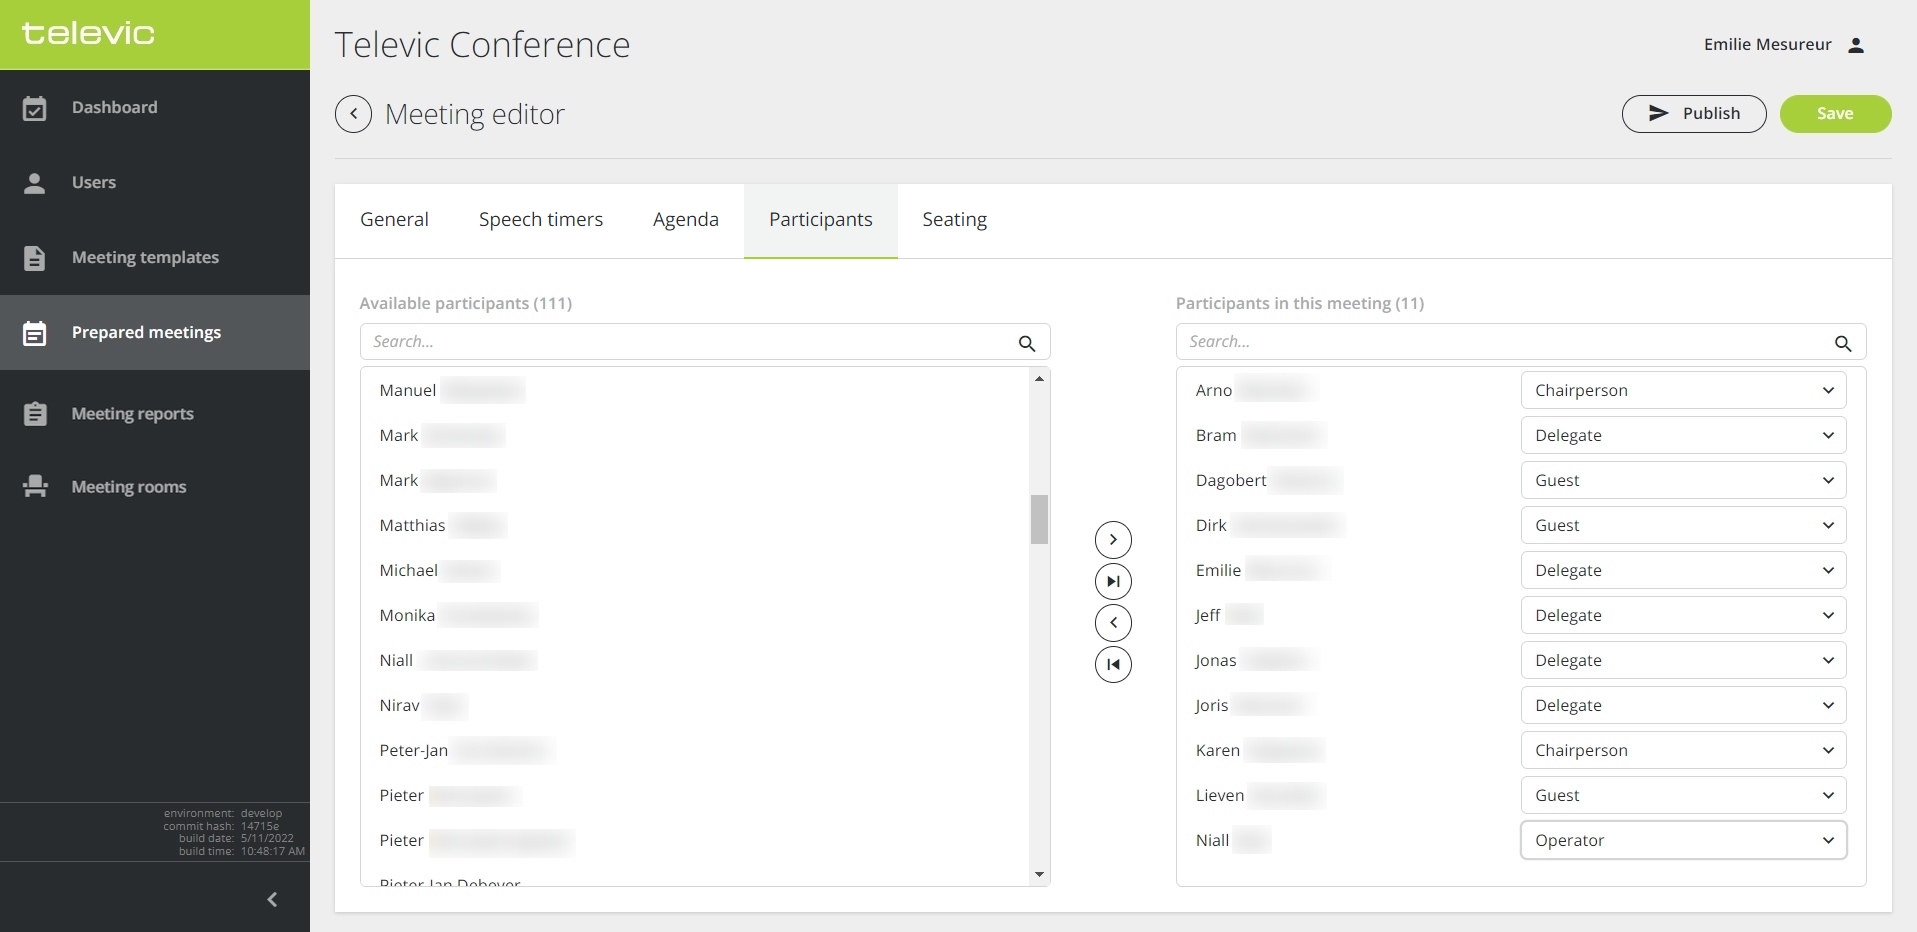
1. In the Participants tab, select the participants in the list of available delegates on the left, and click on to add them one by one in the meeting list on the right. Click on
to add them all at the same time.
2. In the list of selected participants on the right, define a role for each participant: by default, the roles are as follows: delegate, chairperson, guest, operator. But the names can be changed. Click here for more information about participant roles.
Assign Seats
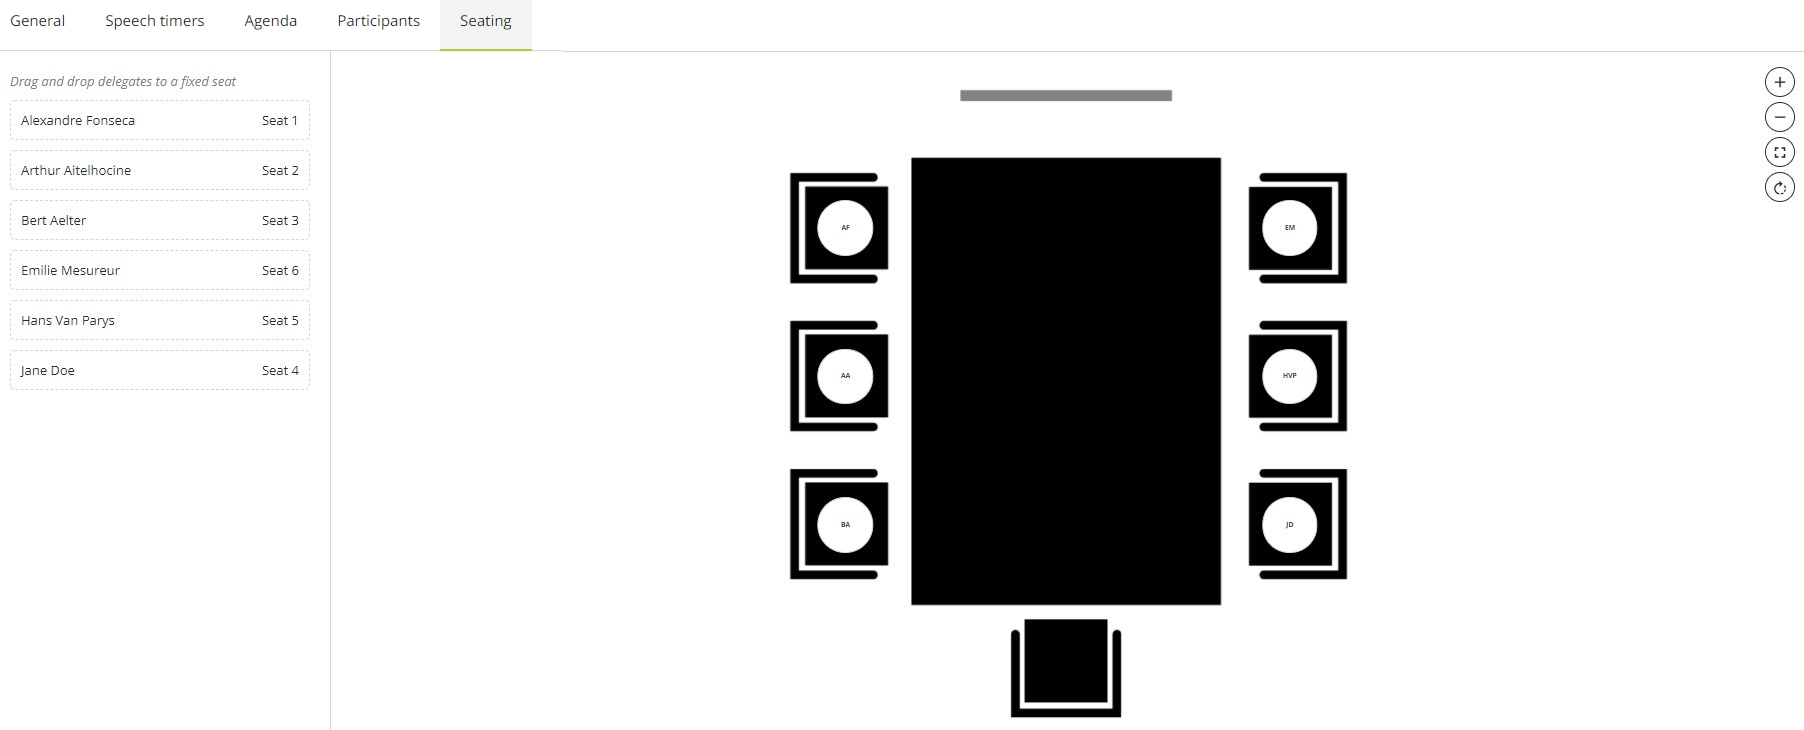
1. In the Seating tab, assign names to seats:
- Drag & drop the name to the seat number of your choice, or
- Click on the seat number, then on the ··· icon, and select the participant in the dropdown list.
2. Use the tools on the right to adjust the display of the seating layout image:
| Zoom in | |
| Zoom out | |
| Default | |
| Rotate |
👉 In case there are seats missing or the configuration of the room is not correct, contact the administrator who will edit or create a new room layout, and add or remove seats.
👉 If you can see the Room Layout icon in the vertical menu panel on the left, it means you have the rights to create new room layouts. Refer to the Confero Room Layout quick guide for more information.
Save the Prepared Meeting
When all the information about the meeting have been entered, click on .
Duplicate a Prepared Meeting
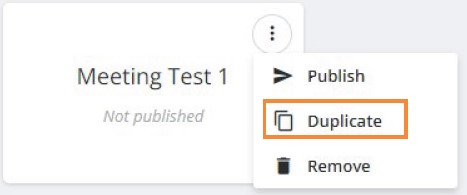
1. In the list of Prepared Meetings, click on the More icon of the meeting you want to duplicate, and select Duplicate:
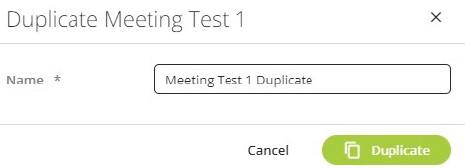
2. The following popup window opens:
3. Enter the name of the duplicated meeting and click on to confirm. Your new duplicated meeting has been added to the list of prepared meetings.
4. You can edit and publish a prepared meeting the same way as a regular prepared meeting.
Delete a Prepared Meeting
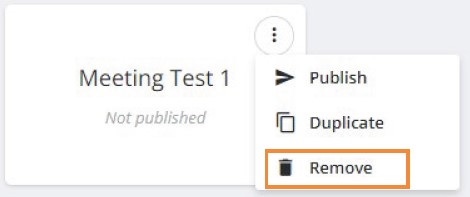
1. In the list of Prepared Meetings, click on the More icon of the meeting you want to duplicate, and select Remove:
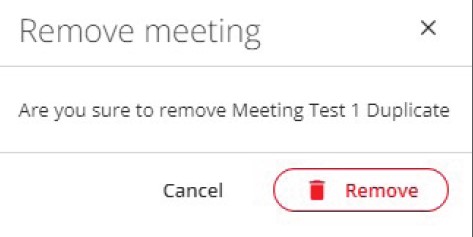
2. The following popup window opens:
3. Click on ![]() to confirm. The prepared meeting has been deleted.
to confirm. The prepared meeting has been deleted.

